Author Topic: Scaletrains SD40-2 install  (Read 20060 times)

BruceRogers

  • Engineer
  • ***
  • Posts: 97
Scaletrains SD40-2 install
« on: June 27, 2017, 10:35:27 AM »
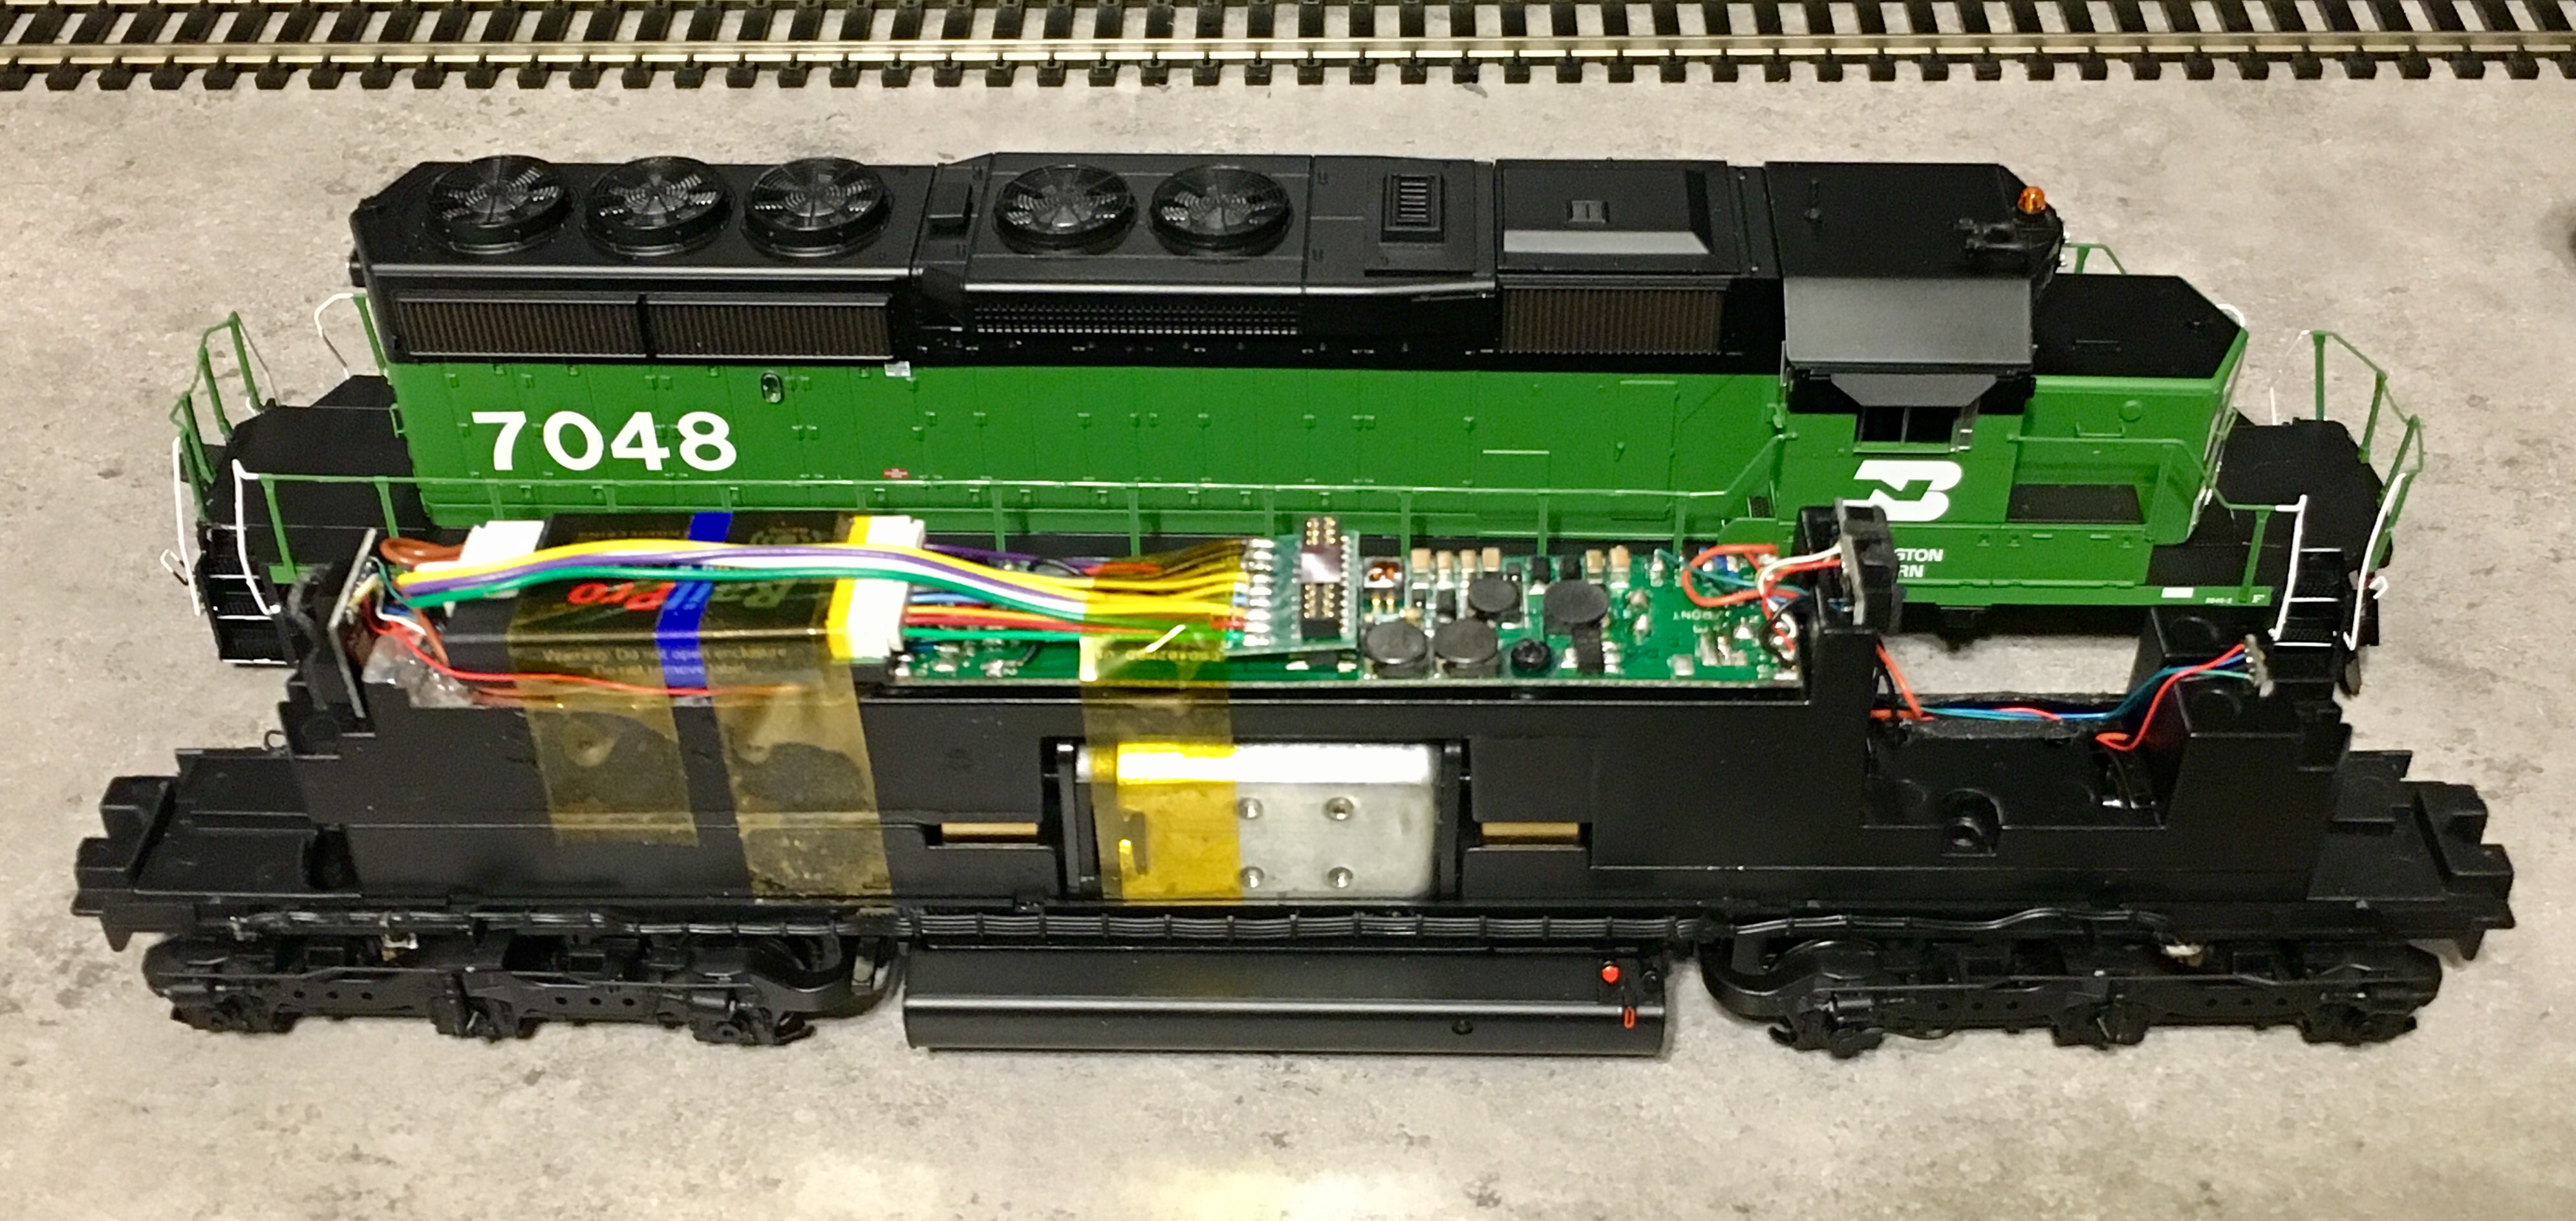
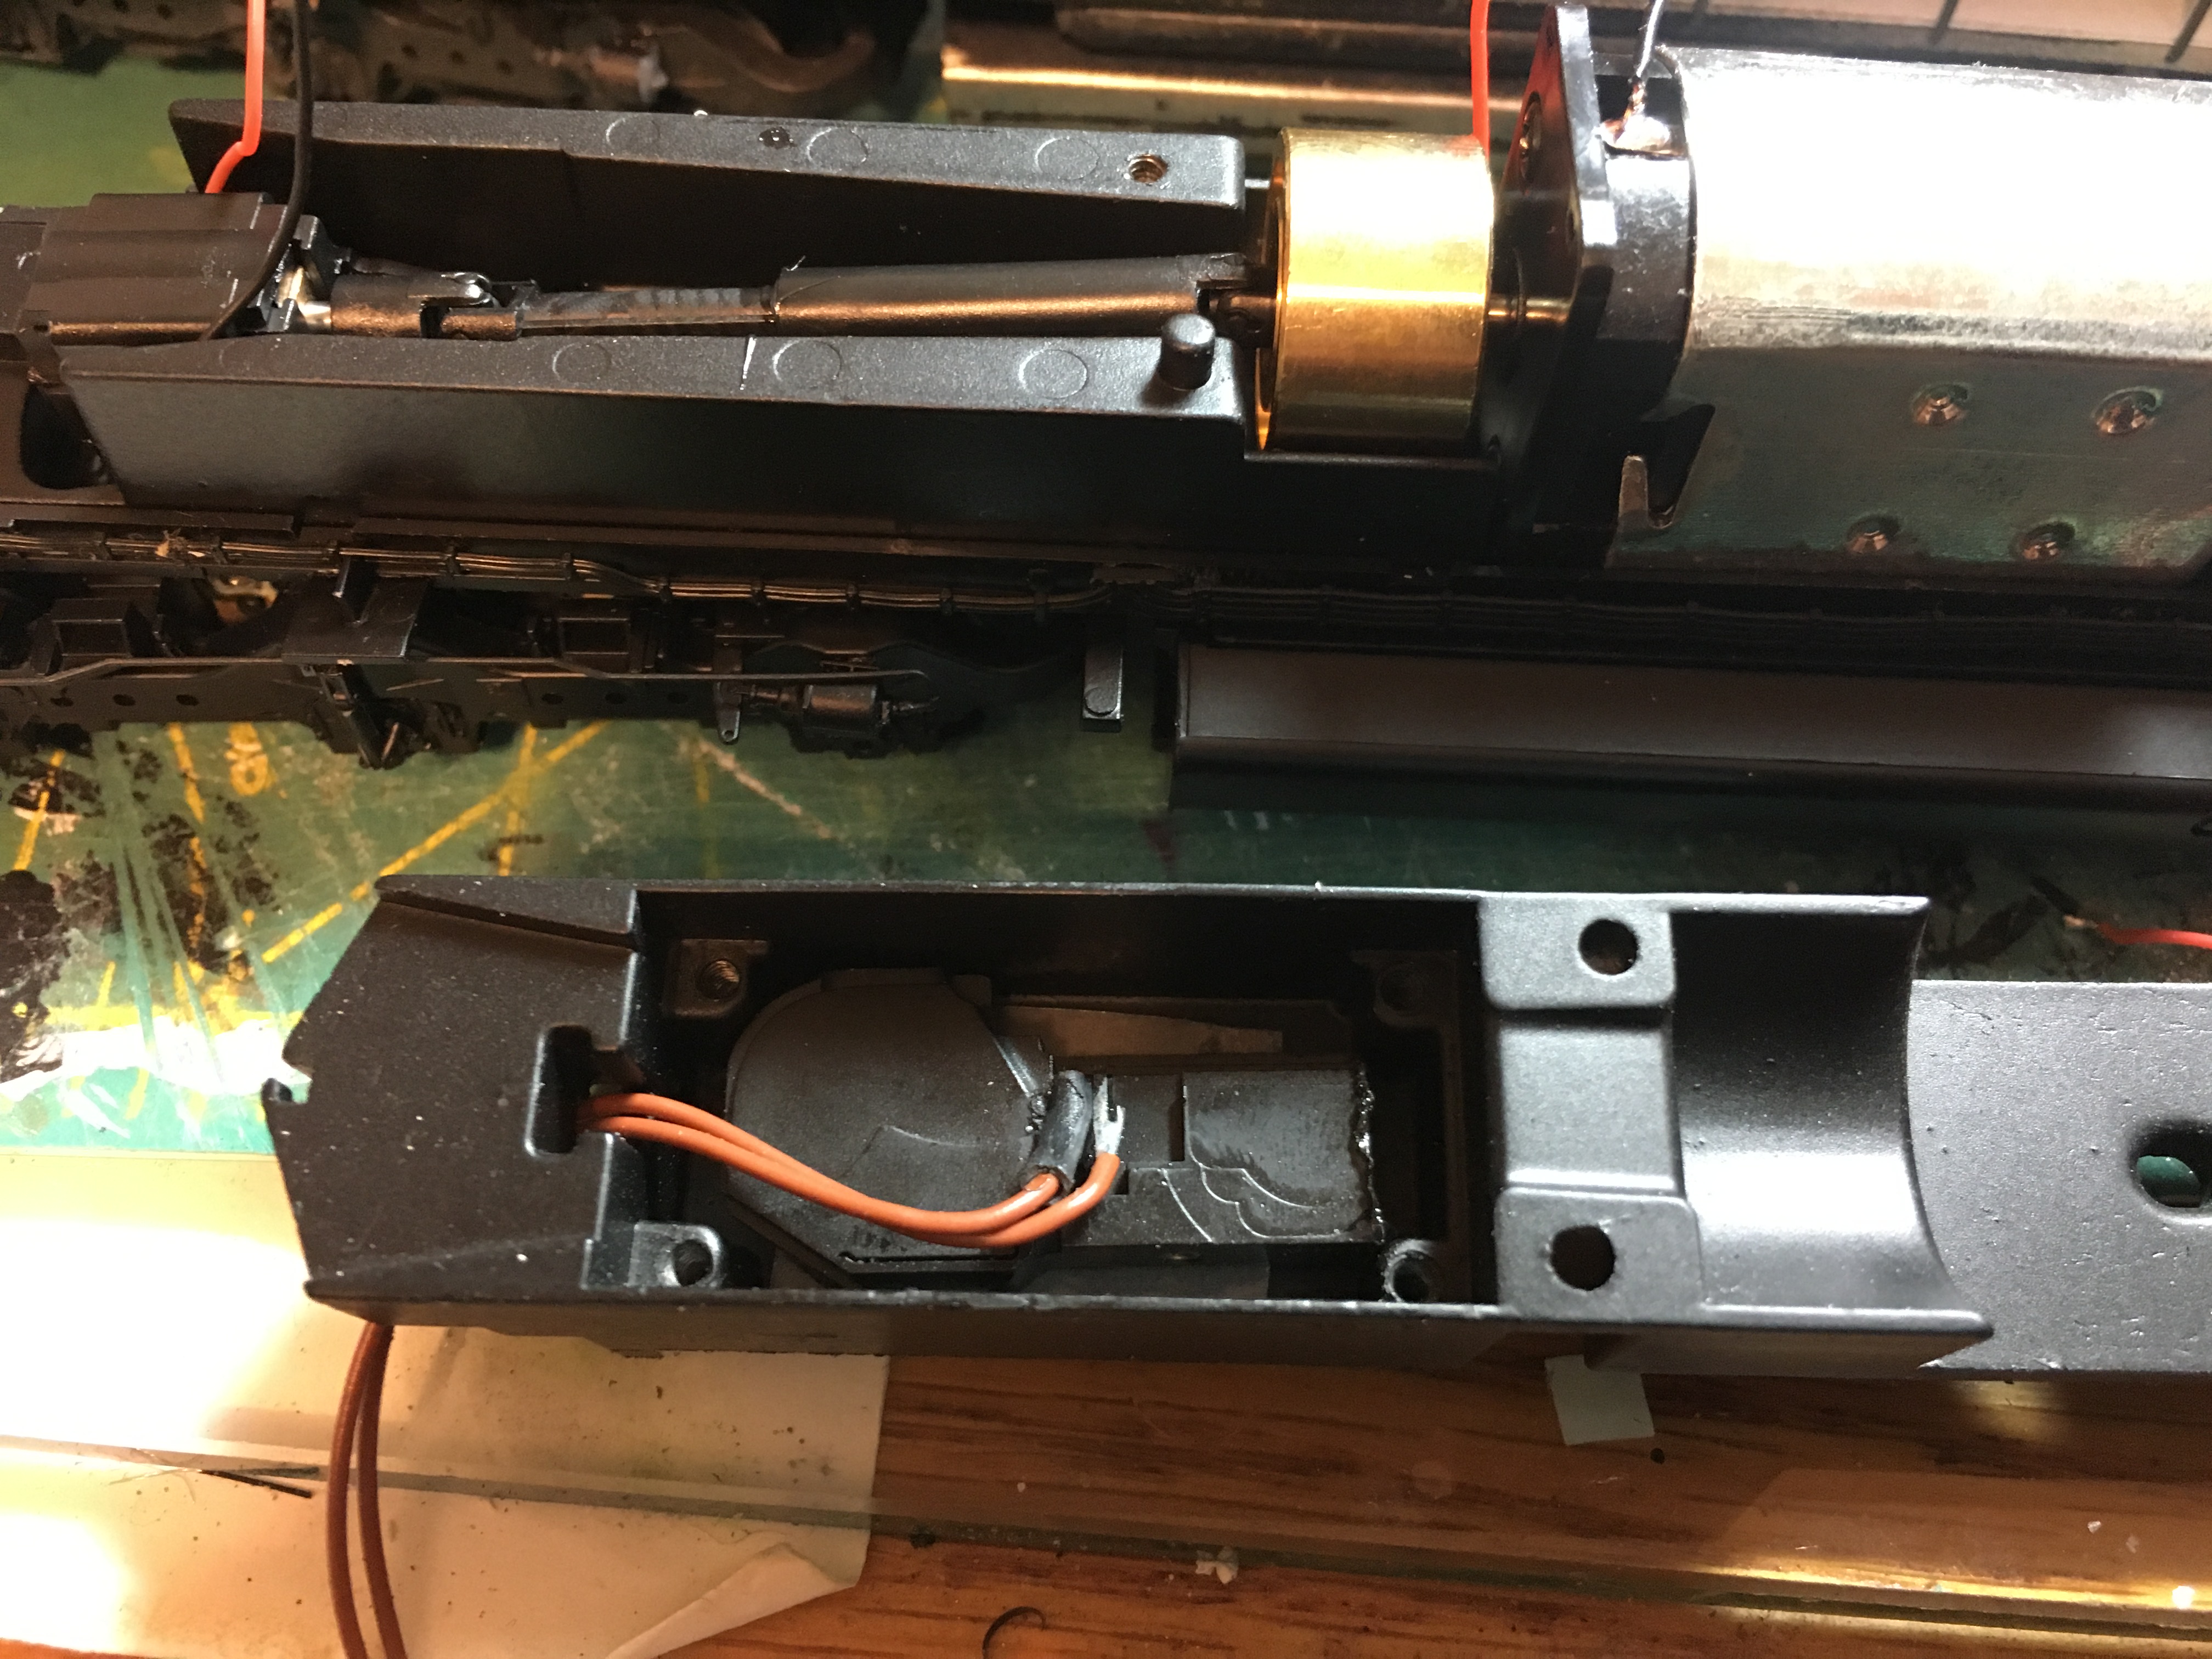
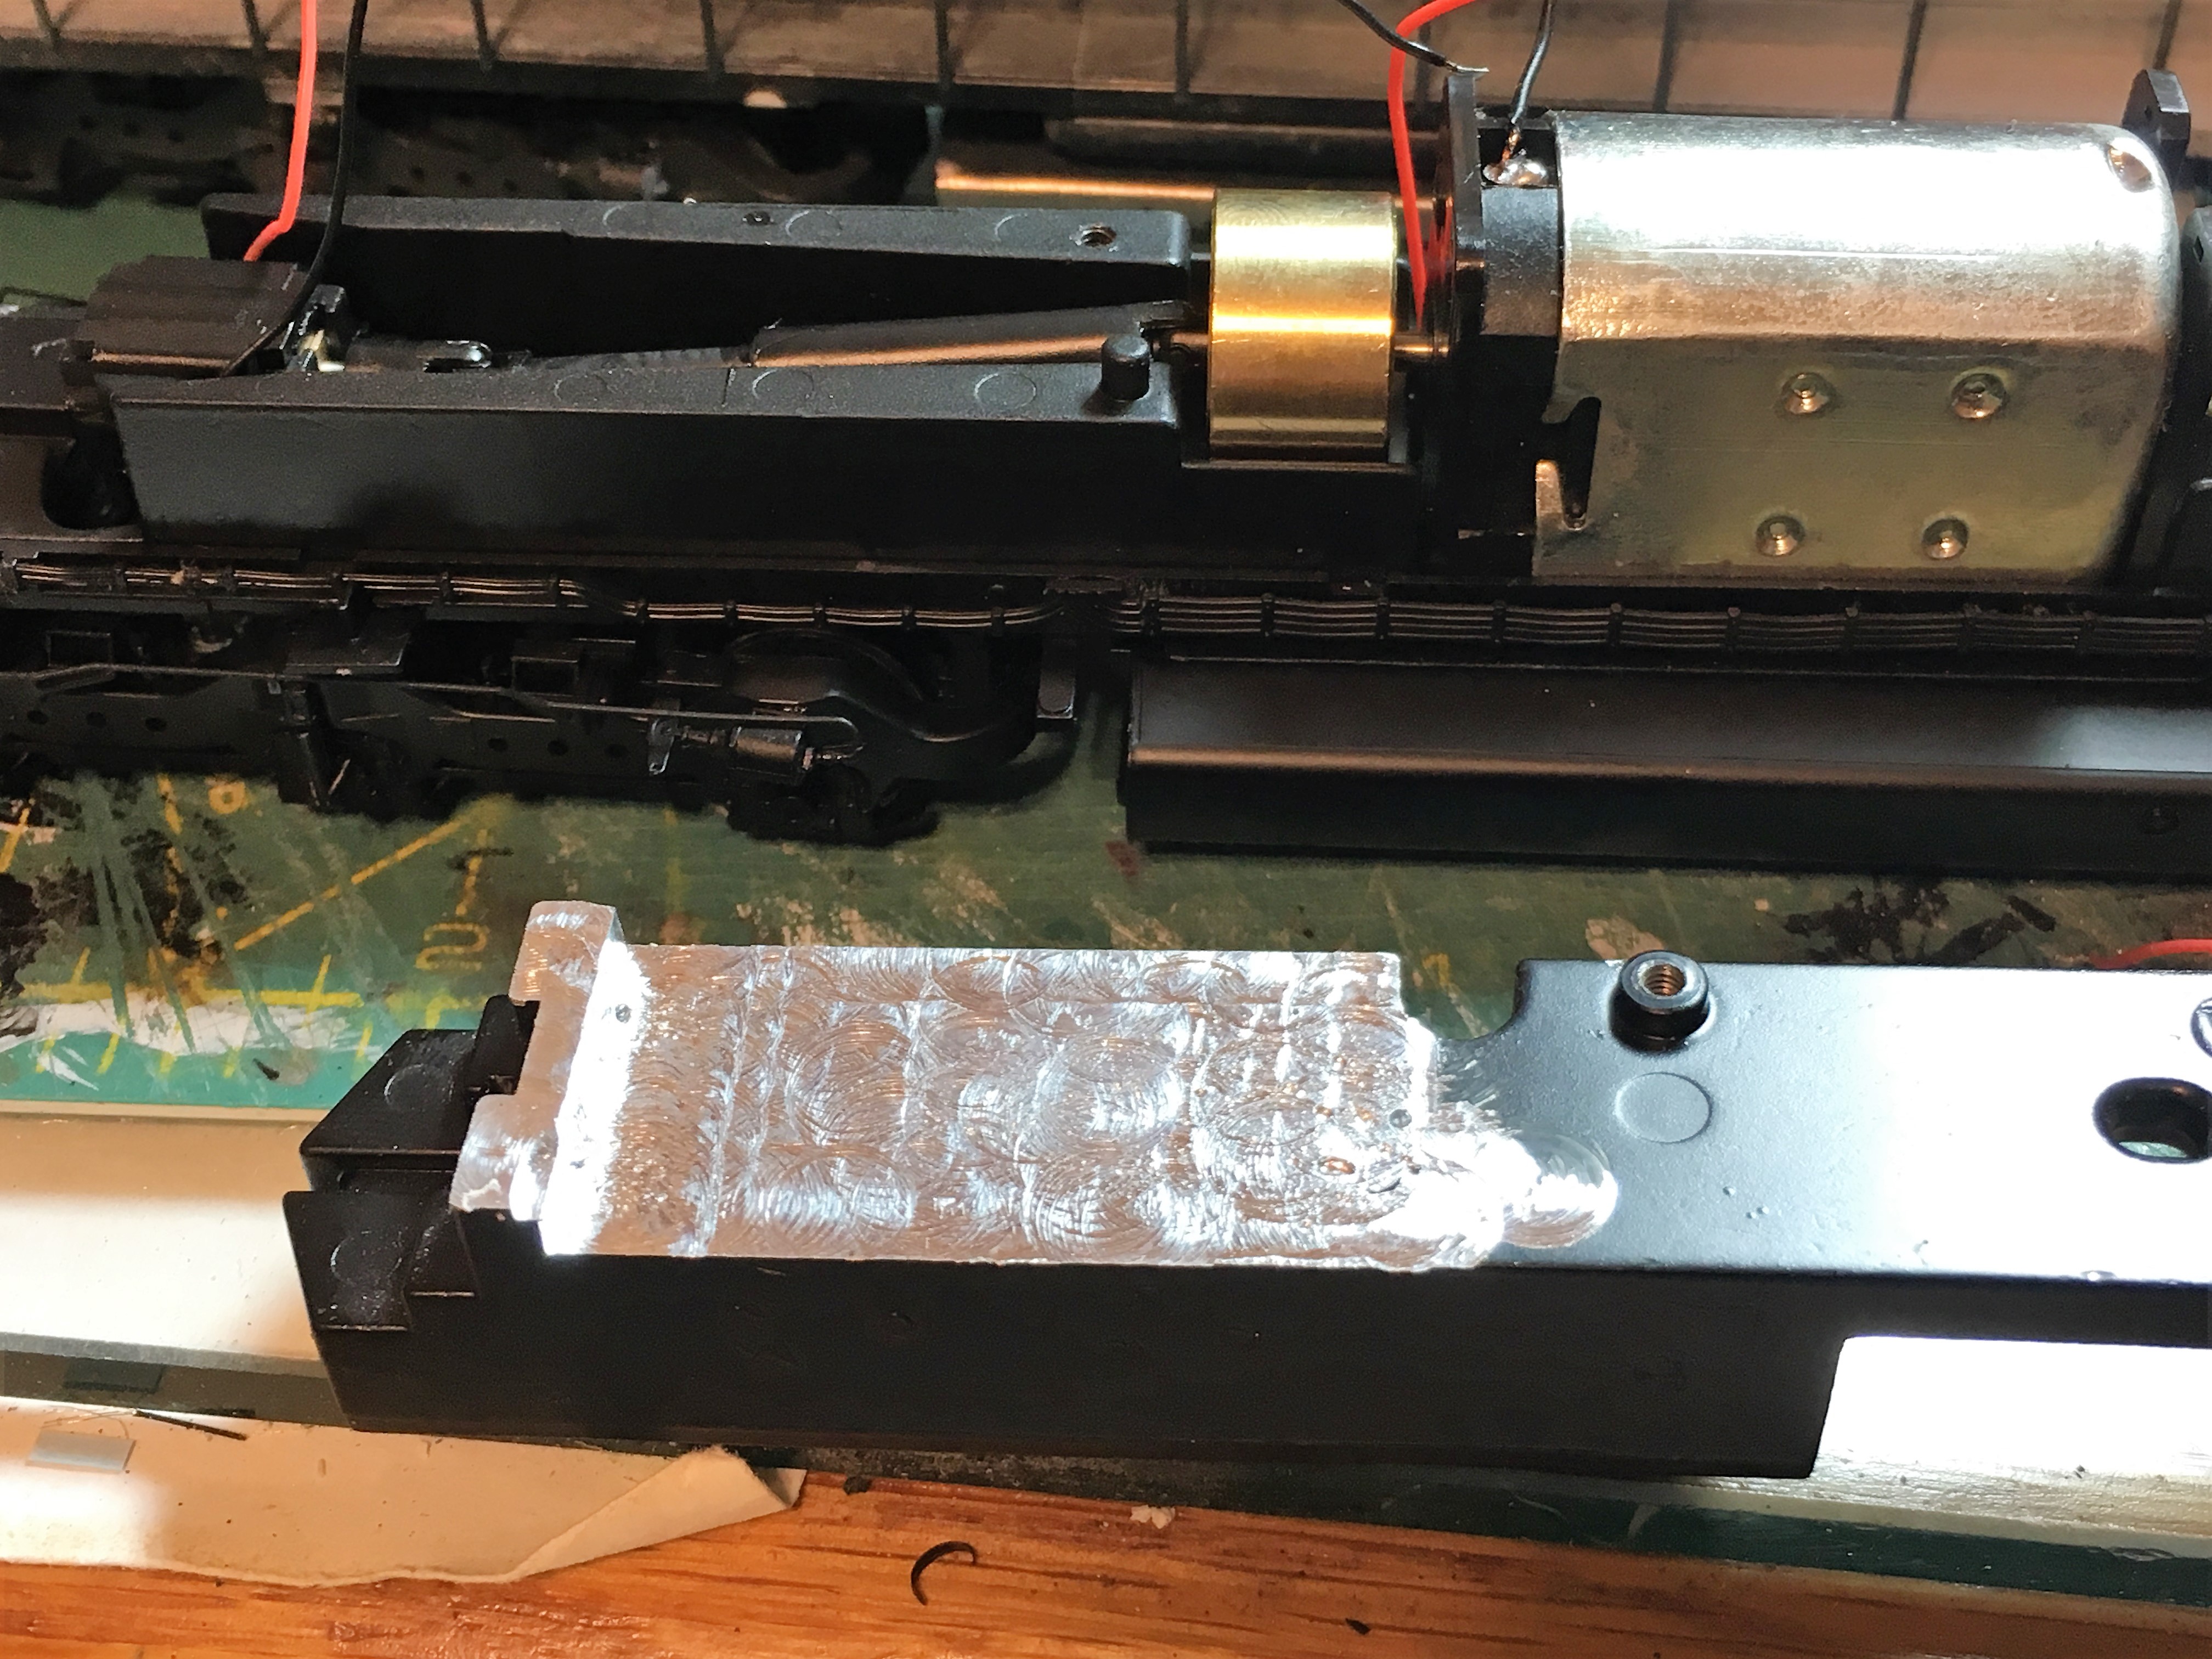
Scale Trains SD40-2 RailPro 1.jpgScale Trains SD40-2 RailPro 4S speaker.jpgScale Trains SD40-2 RailPro Chassis.jpg msg=3016] msg=3016]Scale Trains new SD40-2s arrived in the mail yesterday. Unfortunately it's not an off the shelf install as there's no room for a LM module.
This is what I did. Remove the PC board. You will need to unsolder the motor and truck wires. Mill or cut down the rear of the weight to the level with the PC board area.
You will see there's a cavity under this area for a speaker. I cut down an iPhone 4S one and used double sided foam tape to hold it in place.
With the 9 to 21 pin adapter you will have control of, the white marker lights, Number boards and both headlights.
I have been in contact with Scale Trains to find out which one of the 21 pins feed the beacon, green and red marker lights. It should be possible to feed the 21 pin plug to get the beacon plus the red marker lights operational using the outputs from the rear of LM module.
« Last Edit: June 27, 2017, 10:40:10 AM by BruceRogers »

KPack

  • Conductor
  • ****
  • Posts: 784
Re: Scaletrains SD40-2 install
« Reply #1 on: June 27, 2017, 11:23:23 AM »
Hmmm, I have one these showing up today.  That's a lot of weight in there....install is going to be tricky.  I'm hoping to have space for a speaker up front as well, but it looks like I might be milling to get that to happen.  Or just remove the entire top weight, which isn't exactly what I want to do.

This also presents a problem when it comes to installing a keep-alive, which I also plan to do.  However, I think the factory board might have some capacitors built into it....I'm curious if they are sufficient to keep Railpro running when the locomotive is lifted off the track.

-Kevin

BruceRogers

  • Engineer
  • ***
  • Posts: 97
Re: Scaletrains SD40-2 install
« Reply #2 on: June 27, 2017, 05:00:26 PM »
Kevin, I thought they might be keep-alive too. Whatever the capacitors are there's no effect on the engine. As soon as it's lifted off the rails its dead.

KPack

  • Conductor
  • ****
  • Posts: 784
Re: Scaletrains SD40-2 install
« Reply #3 on: June 27, 2017, 05:16:47 PM »
Well, that answers that question.  Thanks for checking.

Sounds like I'll probably be removing the upper weight, adding all the electronics, and then re-adding weight wherever I can.  I don't need this locomotive to pull 40 cars...since BNSF always runs their locals in pairs (or more) there will always be another locomotive to distribute the weight of the train.  At most my locals will probably be 15 cars.  Easily doable.

-Kevin

Viper

  • Fireman
  • **
  • Posts: 14
Re: Scaletrains SD40-2 install
« Reply #4 on: August 02, 2017, 06:30:26 AM »
Hey Bruce what size harness did you use?, 9 to 21 what is the length of the harness.
Thanks
Ed

BruceRogers

  • Engineer
  • ***
  • Posts: 97
Re: Scaletrains SD40-2 install
« Reply #5 on: August 08, 2017, 04:21:51 PM »
Ed, I used the TCS 1352 1 inch harness. It's all the hobby shop had and it works fine.
Bruce

Viper

  • Fireman
  • **
  • Posts: 14
Re: Scaletrains SD40-2 install
« Reply #6 on: August 09, 2017, 11:32:50 AM »
Cool thanks

Rtardif

  • Fireman
  • **
  • Posts: 3
Re: Scaletrains SD40-2 install
« Reply #7 on: February 20, 2018, 10:28:45 AM »
Just lookin for some advise, i hard wired a Lm3s Into a scaletrains sd40-2 but i cannot get the beacon light to work through the lm3s. Light works when tested on the rail but not through module. I have tried swapping the polarization also. Thanks Ray

BruceRogers

  • Engineer
  • ***
  • Posts: 97
Re: Scaletrains SD40-2 install
« Reply #8 on: February 21, 2018, 12:54:45 PM »
I had to remove the circuit board in the cab roof. There's something in the board that allows Scale Trains to have different light effects for various railroads. I've been meaning to send it to Ring to see what he can figure out.

Rtardif

  • Fireman
  • **
  • Posts: 3
Re: Scaletrains SD40-2 install
« Reply #9 on: February 22, 2018, 11:06:44 PM »
Yeah i cut the wires to that little circuit board in the upper shell and wired then via micro connectors to the green output on the 6 pin side of the LM3S. I got it to work with the double strobe effect. Pretty cool. So i got all the lights working minus the red class lights (ran out of outputs on the LM3S). Pretty easy Loco to hardwire.