Author Topic: Rapido B36-7  (Read 11312 times)

CPRail

  • Conductor
  • ****
  • Posts: 208
  • You know, sometimes I amaze even myself.
Rapido B36-7
« on: December 29, 2023, 11:53:15 AM »
Morning Fellow RailPro crew!

I'm working on an install in a Rapido B36-7 (SP version) and I have a question on the lighting. It comes with a 21 pin plug and has LEDs for the headlights and Gyralites. The Gyralites are directional and are accessed on F13 in DCC land. There is a small board on the chassis with 4 outputs that connect to the light units in the shell - this is for the Gyralites and numberboards.

Plugging in a 21 pin harness to a LM-3S provides the headlights front and rear, but I can't seem to access the Gryalites using any of the available wires on the 9 pin side. I know on an Athearn model I did, I could access the Gyralites using the 9 pin side and the board in the loco (perhaps on the green wire? I can't remember - the loco has cracked gears and is awaiting new replacements.)

I'm guessing I have to use the 6 pin side. Any suggestions on which wire(s) to use?
« Last Edit: December 29, 2023, 03:02:14 PM by CPRail »
Ian Lisakowski
Modelling CP Rail & VIA in the early 80's

G8B4Life

  • Signalman (Global Mod)
  • Conductor
  • *****
  • Posts: 1193
  • I'll think of a catchy tag line one day
Re: Rapido B36-7
« Reply #1 on: December 29, 2023, 06:35:13 PM »
I'm not sure it's going to matter which wire you use, from reading their manual it looks like Rapido is doing funky things with their decoder motherboard like ScaleTrains does, so the Gyralight could be driven from the logic outputs on the ESU decoder which means you can't control it with an LM through the 21 pin plug and motherboard. Unfortunately Rapido hasn't uploaded the decoder file to their website to be able to check what they actually did. Pretty poor effort from Rapido. If you know someone with a decoder equipped version you could get them to read the decoder in JMRI and find out what output on the 21 pin F13 is mapped to, or you can request Rapido send you the non sound decoder file and then that can be easily checked for it's mapping.

What you'll probably have to do though is it cut the Gyralights from the motherboard and hardwire them to the LM. If I get some more time later I'll look into it further but it does look like they've taken the funky route using logic outputs.

- Tim

CPRail

  • Conductor
  • ****
  • Posts: 208
  • You know, sometimes I amaze even myself.
Re: Rapido B36-7
« Reply #2 on: December 29, 2023, 09:24:26 PM »
Argh, not good Tim.

For fun, tomorrow I'll trace the wires back to where they go on the board, just in case that provides some further insight.

Stay tuned.
Ian Lisakowski
Modelling CP Rail & VIA in the early 80's

CPRail

  • Conductor
  • ****
  • Posts: 208
  • You know, sometimes I amaze even myself.
Re: Rapido B36-7
« Reply #3 on: January 19, 2024, 08:21:03 AM »
UPDATE

Apologies, it took longer than I anticipated to get the shots of the other boards. Turns out everytime I was in the layout room, I didn't have a camera or was up to my eyeballs in other projects!

There are 4 leads that connect to the Gyralite board: U+ (red wire), X8/10, U+/X12 and X11.
B36-7 Boards (1).jpg

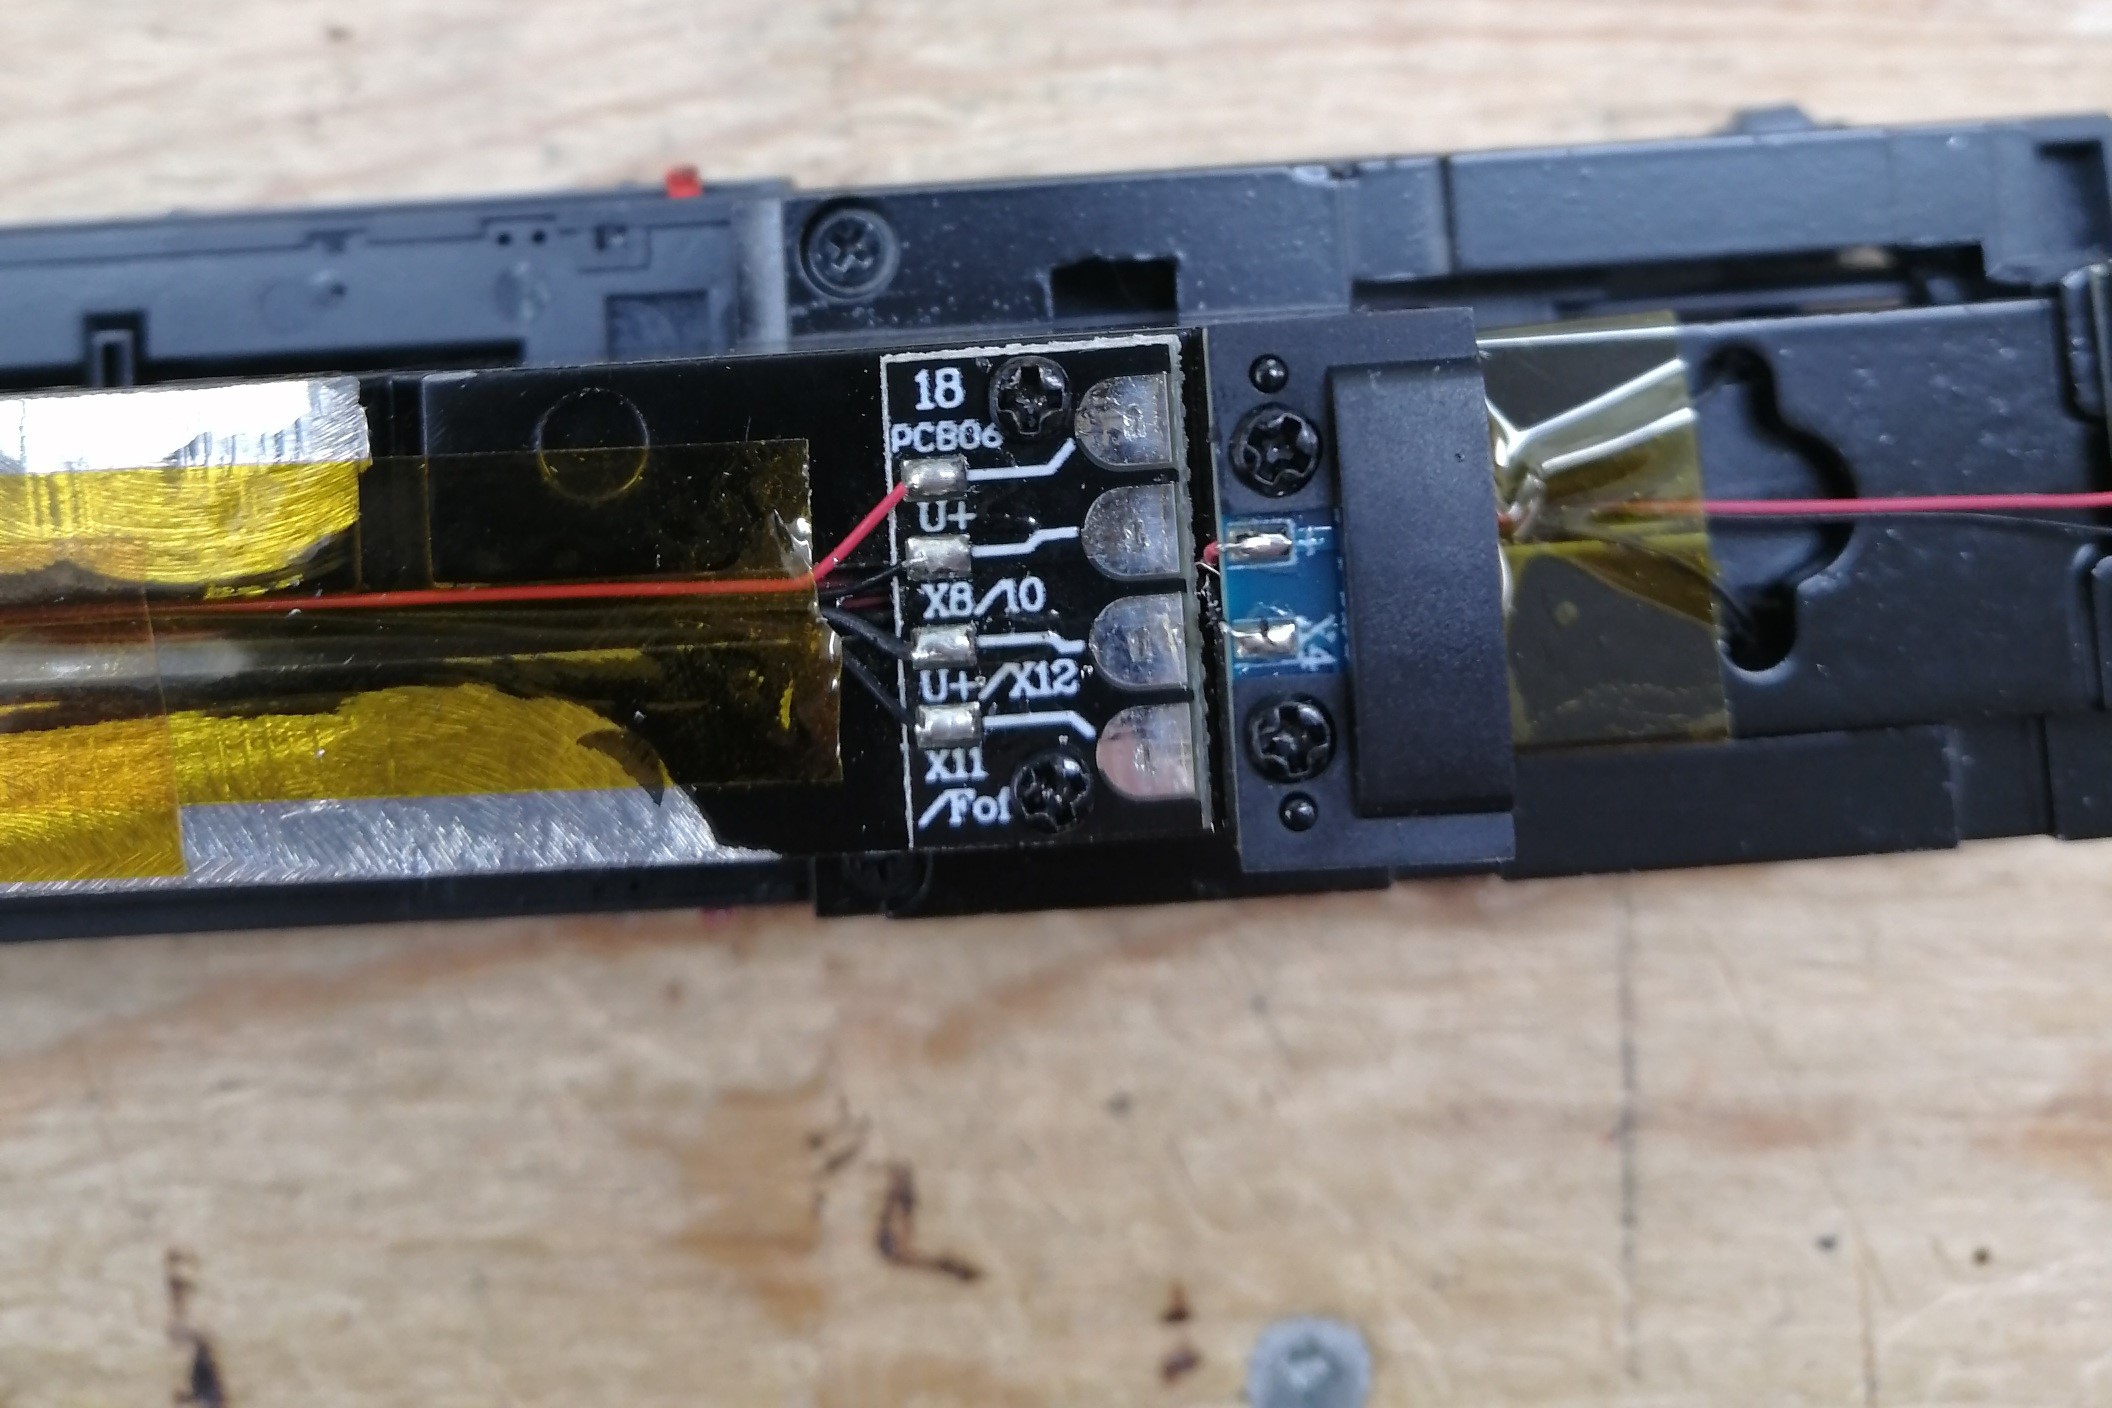
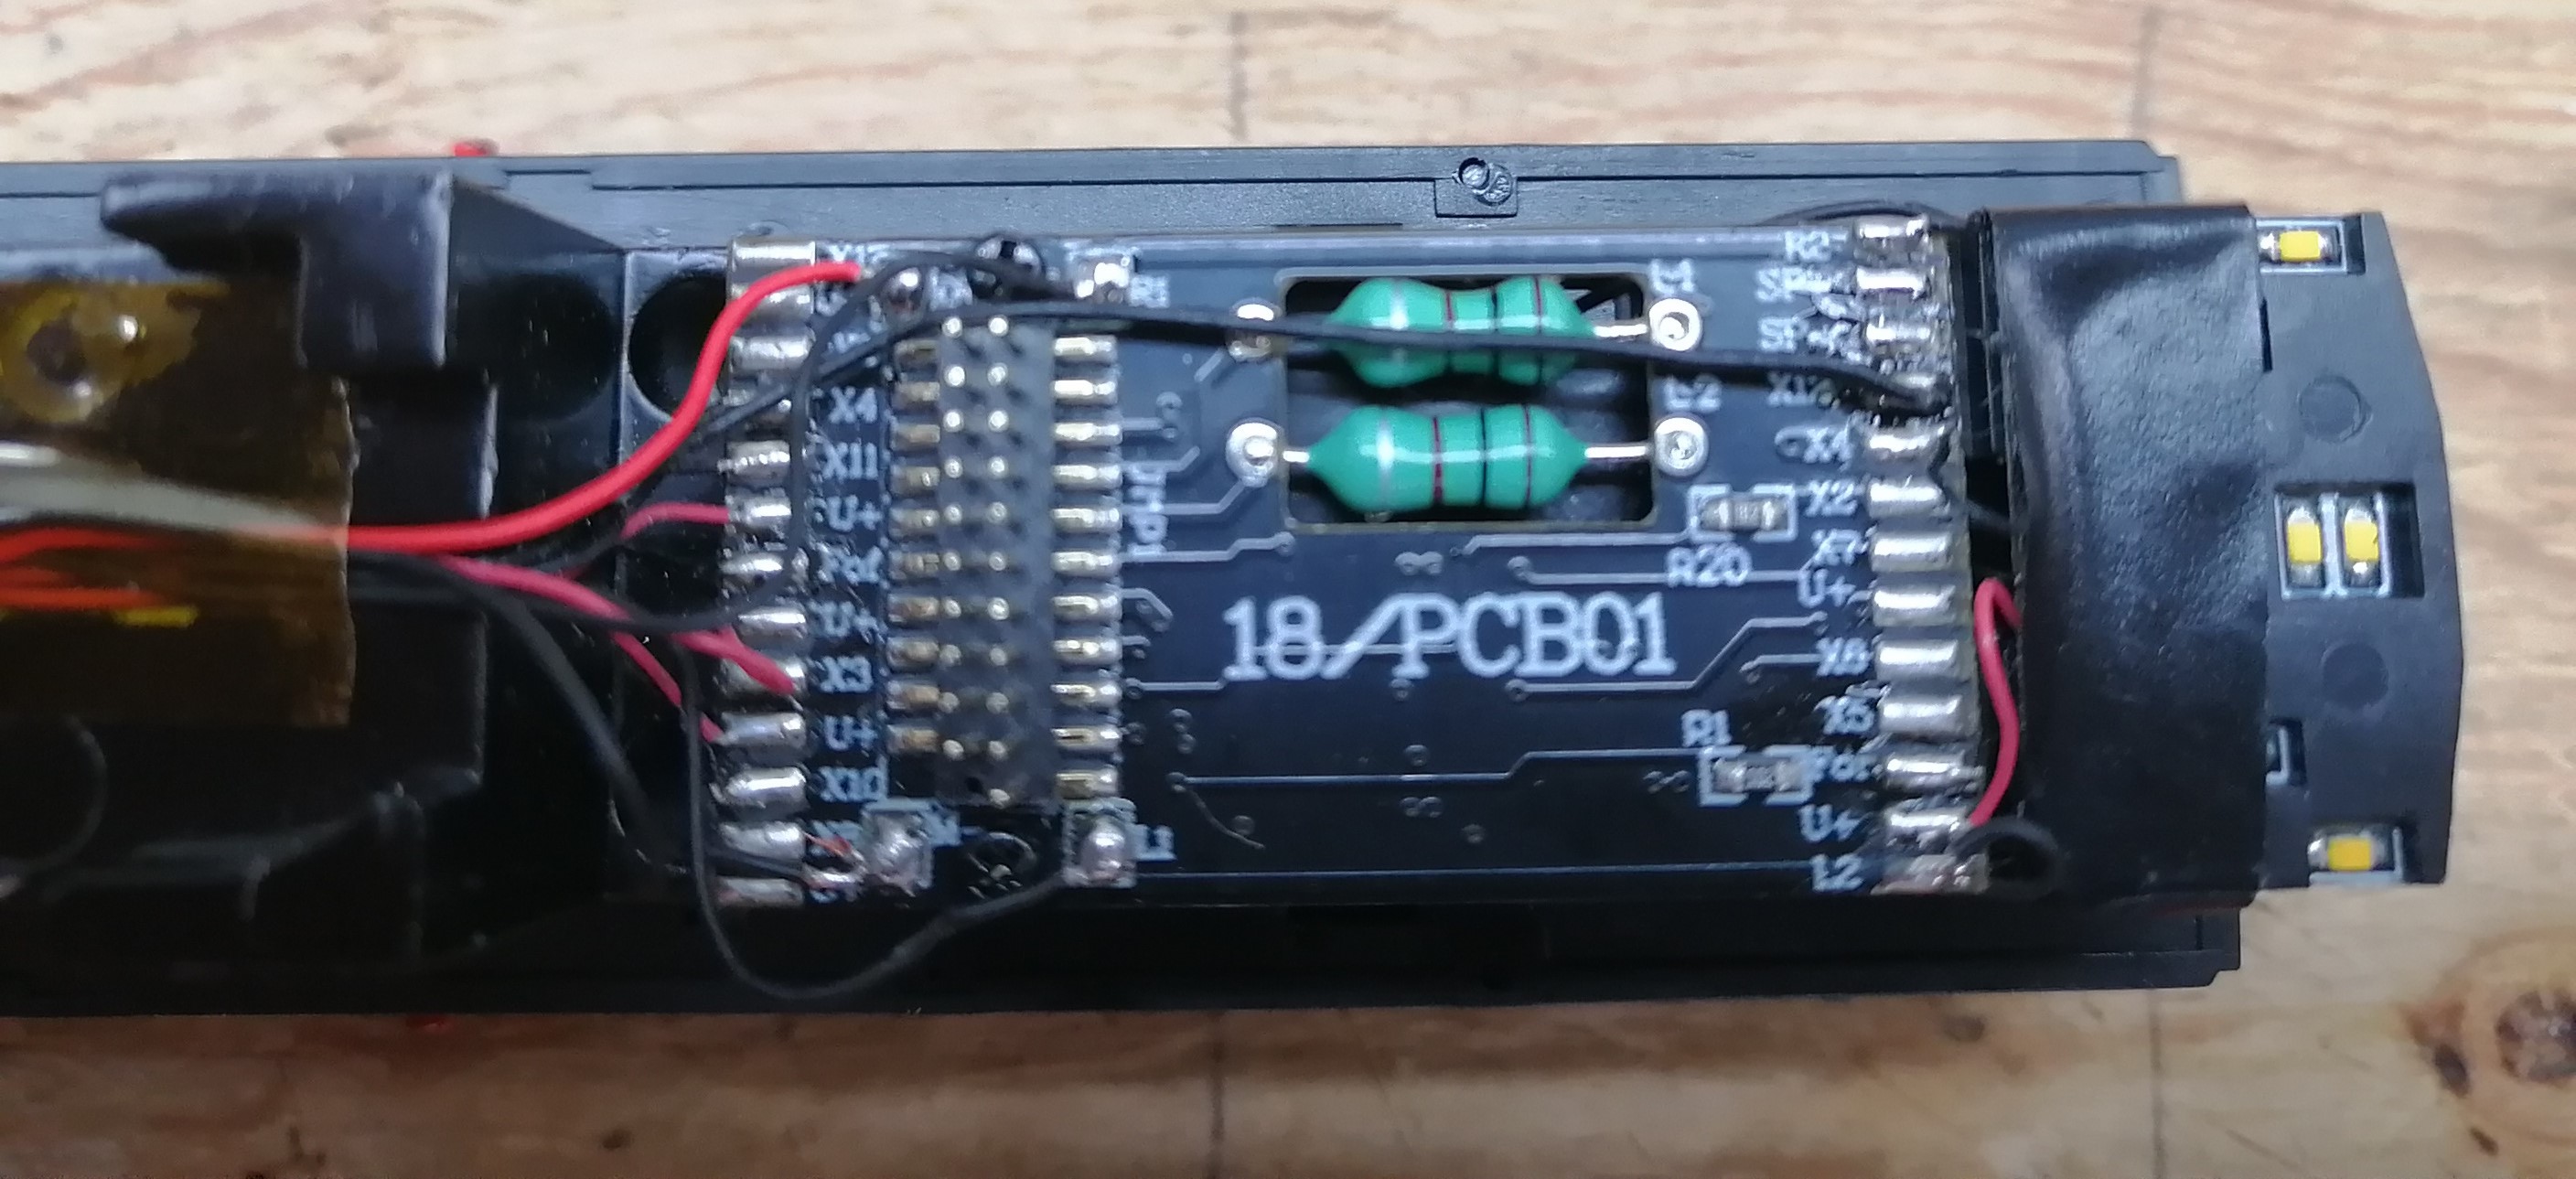
They run to the main board where the 21 pin plug is. U+/X12 is a the far right. NOTE: 21 pin board removed for clarity.
B36-7 Boards (2).jpg

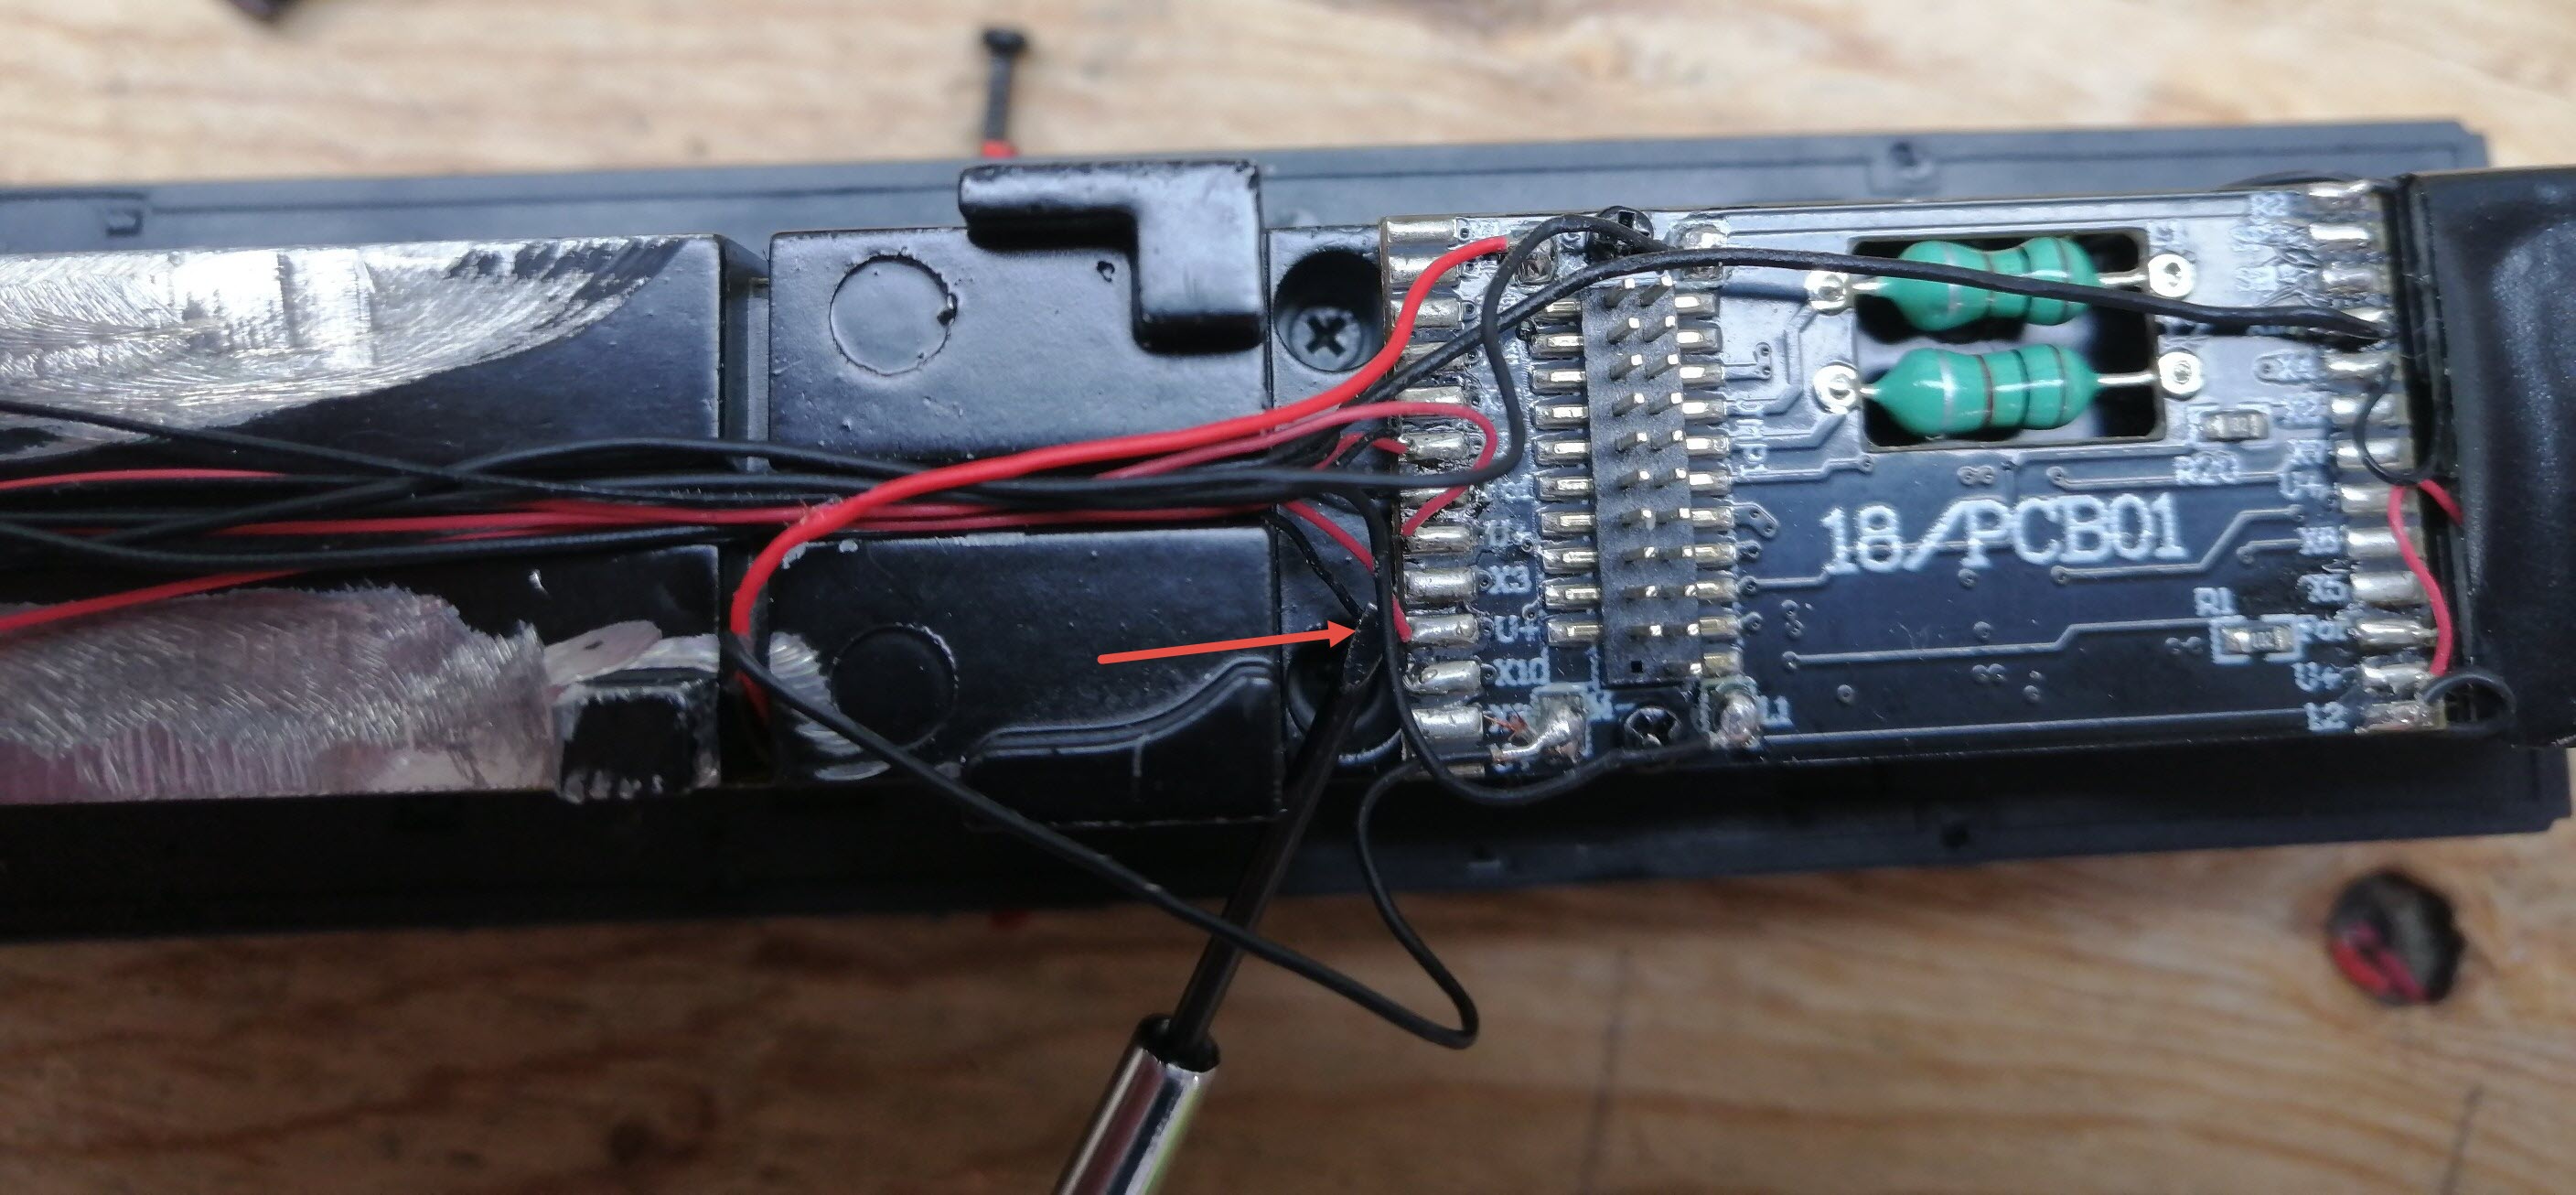
The U+ (red wire) is highlighted here with the screwdriver head and red arrow. X8 is just below X10, which are both below U+ (red wire). X8 is right next to M- which is the black motor wire (M+ red wire is at the top).
B36-7 Boards (3).jpg

Now that we know where the wires go to, is there any magic I can do using the LM-3S to get the Gyralites to work?
Ian Lisakowski
Modelling CP Rail & VIA in the early 80's