Author Topic: Rapido SW1200RS  (Read 7896 times)

CPRail

  • Conductor
  • ****
  • Posts: 207
  • You know, sometimes I amaze even myself.
Rapido SW1200RS
« on: October 03, 2018, 07:27:05 PM »
Hi List,

I cracked open my Rapido SW1200RS (it was easy - not sure why everyone says its a bear). There is room for a LM in there, as long as you move the speaker. Luckily it appears that the speaker will fit where Rapido has a small additional weight, if you cut down the speaker housing a bit.

There is one hindrance. There are two 'buttons' (for lack of the correct word) on the Rapido board labelled 100 with what appears to be copper wire wound around them. Of course, they are right in the middle of where the LM would sit nicely.

I have no idea what they are, or what they are for. I'm hoping that the electrical gurus can identify them and advise. HELP!!

Picture attached of the 'buttons'. More pictures of the guts as I get a chance to upload them.
Ian Lisakowski
Modelling CP Rail & VIA in the early 80's

Alan

  • Conductor
  • ****
  • Posts: 1073
    • LK&O Railroad
Re: Rapido SW1200RS
« Reply #1 on: October 03, 2018, 07:35:53 PM »
They are inductors (coils / chokes). They need to be taken out and replaced with a jumper during LM installation. Refer to this thread: https://rpug.pdc.ca/index.php/topic,295.msg2101.html#msg2101
Alan

LK&O Railroad website

When I was a kid... no wait, I still do that. HO, 28x32, double deck, 1969, RailPro

CPRail

  • Conductor
  • ****
  • Posts: 207
  • You know, sometimes I amaze even myself.
Re: Rapido SW1200RS
« Reply #2 on: October 04, 2018, 01:04:59 PM »
Thanks Alan. I knew someone would know what they are. I read the recommended thread, but I didn't see anything about installing a jumper. Am I just jumping between the two locations across the board or?

To me electronics are mysterious smoke filled things (I believe we proved that electronics are smoke powered a while ago <wink wink>), so I need your steady hand on the tiller as I navigate this wee beastie.

I just love being the pioneer on installs...
Ian Lisakowski
Modelling CP Rail & VIA in the early 80's

Alan

  • Conductor
  • ****
  • Posts: 1073
    • LK&O Railroad
Re: Rapido SW1200RS
« Reply #3 on: October 04, 2018, 02:48:14 PM »
Unsolder the inductor. Remove it from the board. Solder a wire across the two holes. Repeat for the second. You are replacing each inductor with a piece of wire.

You may want to try the installation with the inductors in place. Tim reported the LM doesn't play well with them but your inductors may not be the same value as were his. You may get different results. We sort of determined that RP uses a higher frequency PWM than does DCC hence why the inductors work with DCC and not RP. Series inductors block high frequencies. They are low-pass filters i.e. they only allow signals below a certain frequency (determined by the inductor value) to pass through. They also help prevent the circuit from becoming an antenna that would mess with radios and the like. We suspect this is the reason they are included.
Alan

LK&O Railroad website

When I was a kid... no wait, I still do that. HO, 28x32, double deck, 1969, RailPro

CPRail

  • Conductor
  • ****
  • Posts: 207
  • You know, sometimes I amaze even myself.
Re: Rapido SW1200RS
« Reply #4 on: December 14, 2018, 06:54:01 PM »
Continuing my descent into madness by working on tight switcher installs, I finally got time to work on this unit. The inductors are successfully removed and jumped, the speaker has been trimmed to fit and now I am in the getting it all to fit under the hood stage.

As you can see on the attached photo, the LM-3S protrudes above the light assembly for the front of this unit. If you recall, SW1200s have angled top hoods the length of the unit. The light assembly shows what I need to adjust on the LM-3S. This is the 6 pin end, but the adjustment needs to be the length of the module.

Before I start hacking away at the module to angle the sides, what's under the hood of a LM-3S? Should I unwrap the module and hack away, or would it be wiser to toss the board and hard wire in the module.

Before you say toss the board, be advised that these Rapido units are FULL of lighting. Cab interior, number boards, class lights, headlights, ditch lights, truck lights, and I'm sure there is something I've forgotten. That board is crucial to getting all the lights to work. I haven't figured out all of them yet, but I do have the head lights and class lights working just off the 9 pin side so far.

Thoughts, comments, rude remarks from the Learned Experts of RPUG?

Ian Lisakowski
Modelling CP Rail & VIA in the early 80's

Alan

  • Conductor
  • ****
  • Posts: 1073
    • LK&O Railroad
Re: Rapido SW1200RS
« Reply #5 on: December 14, 2018, 07:12:19 PM »
Looking at you image I have to say no way. The plastic wrapper around a LM is thin plastic with the innards tight against it for the most part. Minus wrapper you save maybe 0.060" total width/height. Looks like you need much more than a few thousandths.
Alan

LK&O Railroad website

When I was a kid... no wait, I still do that. HO, 28x32, double deck, 1969, RailPro

CPRail

  • Conductor
  • ****
  • Posts: 207
  • You know, sometimes I amaze even myself.
Re: Rapido SW1200RS
« Reply #6 on: December 15, 2018, 05:01:20 PM »
Nuts. I really was hoping to avoid tossing the board. More poking and pondering to come!

Stay tuned.
Ian Lisakowski
Modelling CP Rail & VIA in the early 80's

CPRail

  • Conductor
  • ****
  • Posts: 207
  • You know, sometimes I amaze even myself.
Re: Rapido SW1200RS
« Reply #7 on: March 11, 2019, 04:25:59 PM »
I've done as much pondering as possible, and Alan is right. The board has got to go.

Assuming I can figure out which leads on the board go to the headlights (the cab headlight has solder pads, so it's easy), what do I need to do to ensure that RailPro doesn't blow up those nice SMDs that Rapido uses?

I presume some kind of resistor or something?

If I switch to micro-bulbs, I suspect I need something as well, but what?
Ian Lisakowski
Modelling CP Rail & VIA in the early 80's

Alan

  • Conductor
  • ****
  • Posts: 1073
    • LK&O Railroad
Re: Rapido SW1200RS
« Reply #8 on: March 11, 2019, 04:58:44 PM »
I presume some kind of resistor or something?

Yes. 1,000 ohm (1k) is a good starting value to try. Higher resistor values (1.5K - 10k) will make the LED dimmer. Lower resistor values (680 - 910) will make the LED brighter.

If I switch to micro-bulbs, I suspect I need something as well, but what?

Stick with LEDs. Bulbs eventually burn out.
Alan

LK&O Railroad website

When I was a kid... no wait, I still do that. HO, 28x32, double deck, 1969, RailPro

emd_16645

  • Conductor
  • ****
  • Posts: 114
    • Somerset Junction, 1980
Re: Rapido SW1200RS
« Reply #9 on: March 12, 2019, 02:50:44 PM »
Before junking the factory board, is there any wasted space between the board and the motor?  I've seen in some cases where there is as much as 1/4" between the top of the motor and the board.  Might be able to cut down the spacer to gain your space.
Chris Bellows
Somerset Junction, 1980
somersetjunction.blogspot.com

KPack

  • Conductor
  • ****
  • Posts: 770
Re: Rapido SW1200RS
« Reply #10 on: March 12, 2019, 04:55:05 PM »
I still find it easier to just completely ditch the factory board.  It's so much easier to install Railpro when you have space to work with.  It makes everything neat and clean, and allows you to fit wires without having to stuff them all inside the shell.

Like Alan said, use 1K ohm resistors for LEDs.  Don't bother with bulbs.  Remove the factory board and trace the wires to where they go.  They will go to the following locations:

-Motor (2)
-Track power (2 per truck)
-Lights (2 per light)

And that's it.  As soon as you know where the wires lead to, you know how to hook them up.  If the model has LEDs, they will only work when the polarity is correct (negative and positive wires going to the correct lead on the LED).  If they are backwards, no harm done....it just won't light up.  Switch the wires and you are good to go.

Hardwiring is not as hard as it seems.  Sure, the first couple of times it will be slow and you will get frustrated.  But once you realize that it's just connecting the correct wires to each other, it becomes easy.  It's just a bit of a chore to do it.  In the end your install will be cleaner and have less issues, so it's worth it.

-Kevin

CPRail

  • Conductor
  • ****
  • Posts: 207
  • You know, sometimes I amaze even myself.
Re: Rapido SW1200RS
« Reply #11 on: March 13, 2019, 09:50:16 AM »
There is a bit of wasted space between the board and the motor, but the board has the front headlights in a housing (as seen in my photo) that rests at the correct height on a bit of frame. I could buzz the frame metal, but then the headlight housing is in the wrong location.

Tossing the board is the best option. I don't need all the extra lights that Rapido has built in - just the headlights and ditchlights.

Once I get over this cold, and am thinking clearer, I'll take the next step - with photos!

The joys of pioneering installs...
Ian Lisakowski
Modelling CP Rail & VIA in the early 80's

KPack

  • Conductor
  • ****
  • Posts: 770
Re: Rapido SW1200RS
« Reply #12 on: March 13, 2019, 05:43:00 PM »
The joys of pioneering installs...

That's how all of my installs have been: uncharted territory.  You will quickly figure out that each locomotive model and manufacturer require a different approach to install Railpro.  The one (mostly) constant step for my installs is to remove all factory boards.  I then figure out from there how to best make the module, speakers, and keep alive fit.

-Kevin

CPRail

  • Conductor
  • ****
  • Posts: 207
  • You know, sometimes I amaze even myself.
Re: Rapido SW1200RS
« Reply #13 on: December 29, 2019, 08:34:25 PM »
It's DONE!!  ;D

My apologies to all for this install taking forever. I had tossed the board as Kevin had suggested and hard-wired in the LM-3S. I also ground down the two cast in screw bosses on the frame for attaching the board.

I then ran into some weird operational issues. For some reason, no matter what settings I changed in Railpro, I could not get the until to start or stop nice and smooth. Once it starting running, she was smooth as silk, but she'd jerk into action and then jerk to a stop. After taking most of the drive train apart, thinking I had a cracked gear or something, I determined that the motor has some serious cogging issues. A quick note to Rapido solved that issue, but I just couldn't get around to working on the unit, so she sat.

It's finally vacation time for me and as a bonus, the Winnipeg Jets were playing this afternoon, so today was an ideal day to try and get everything back together.

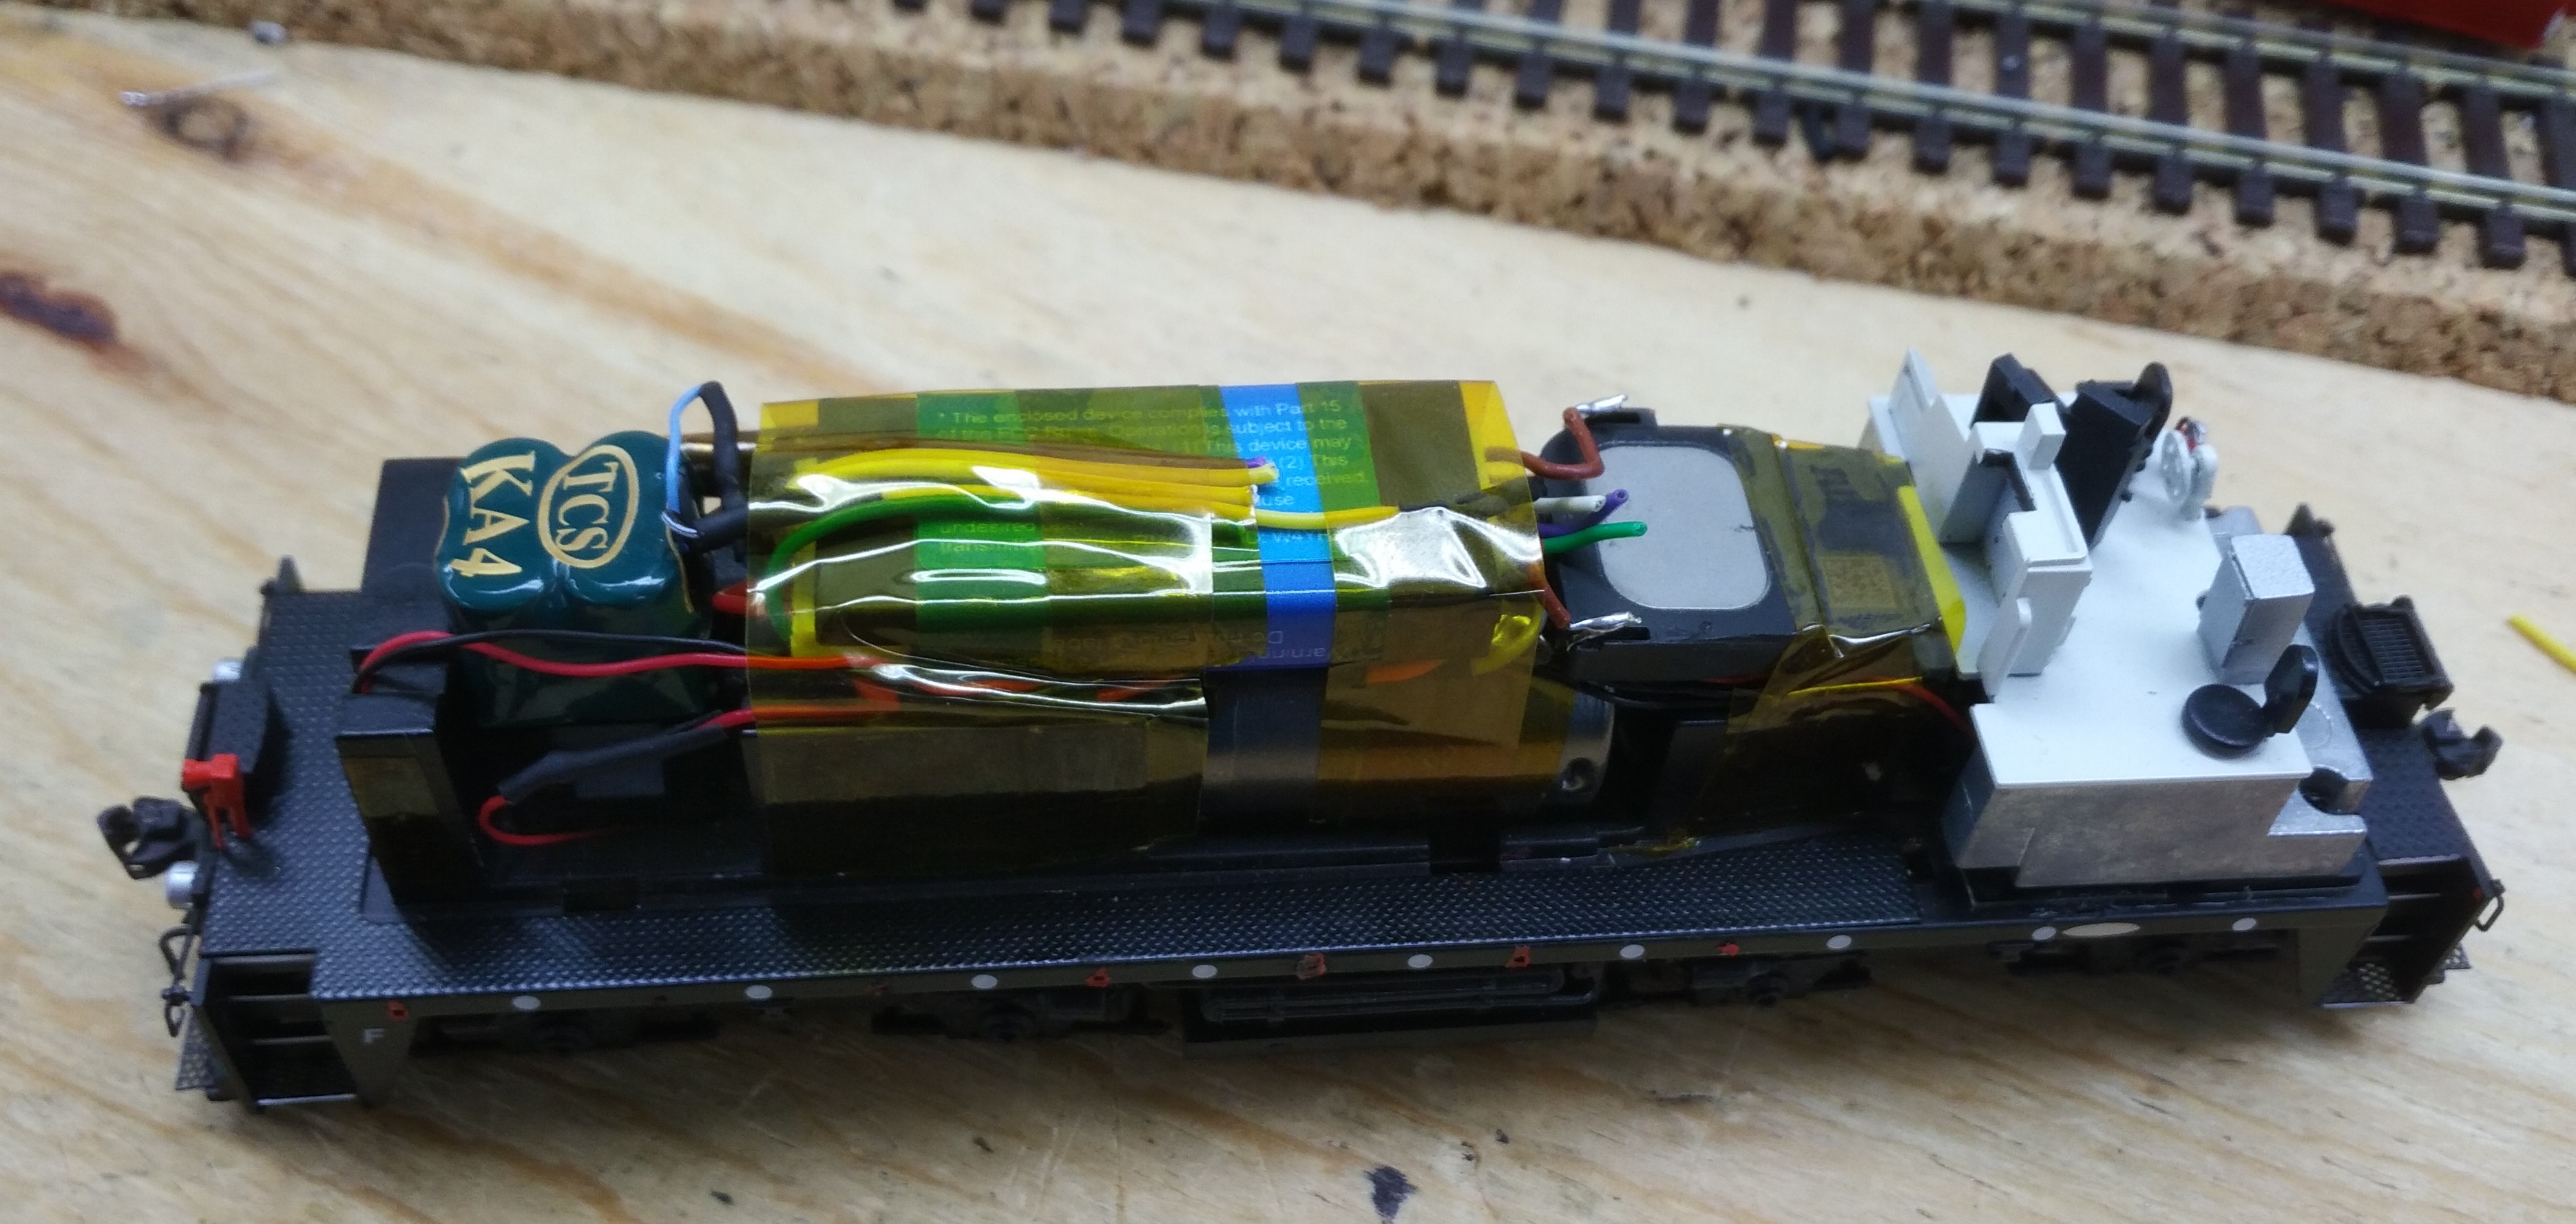
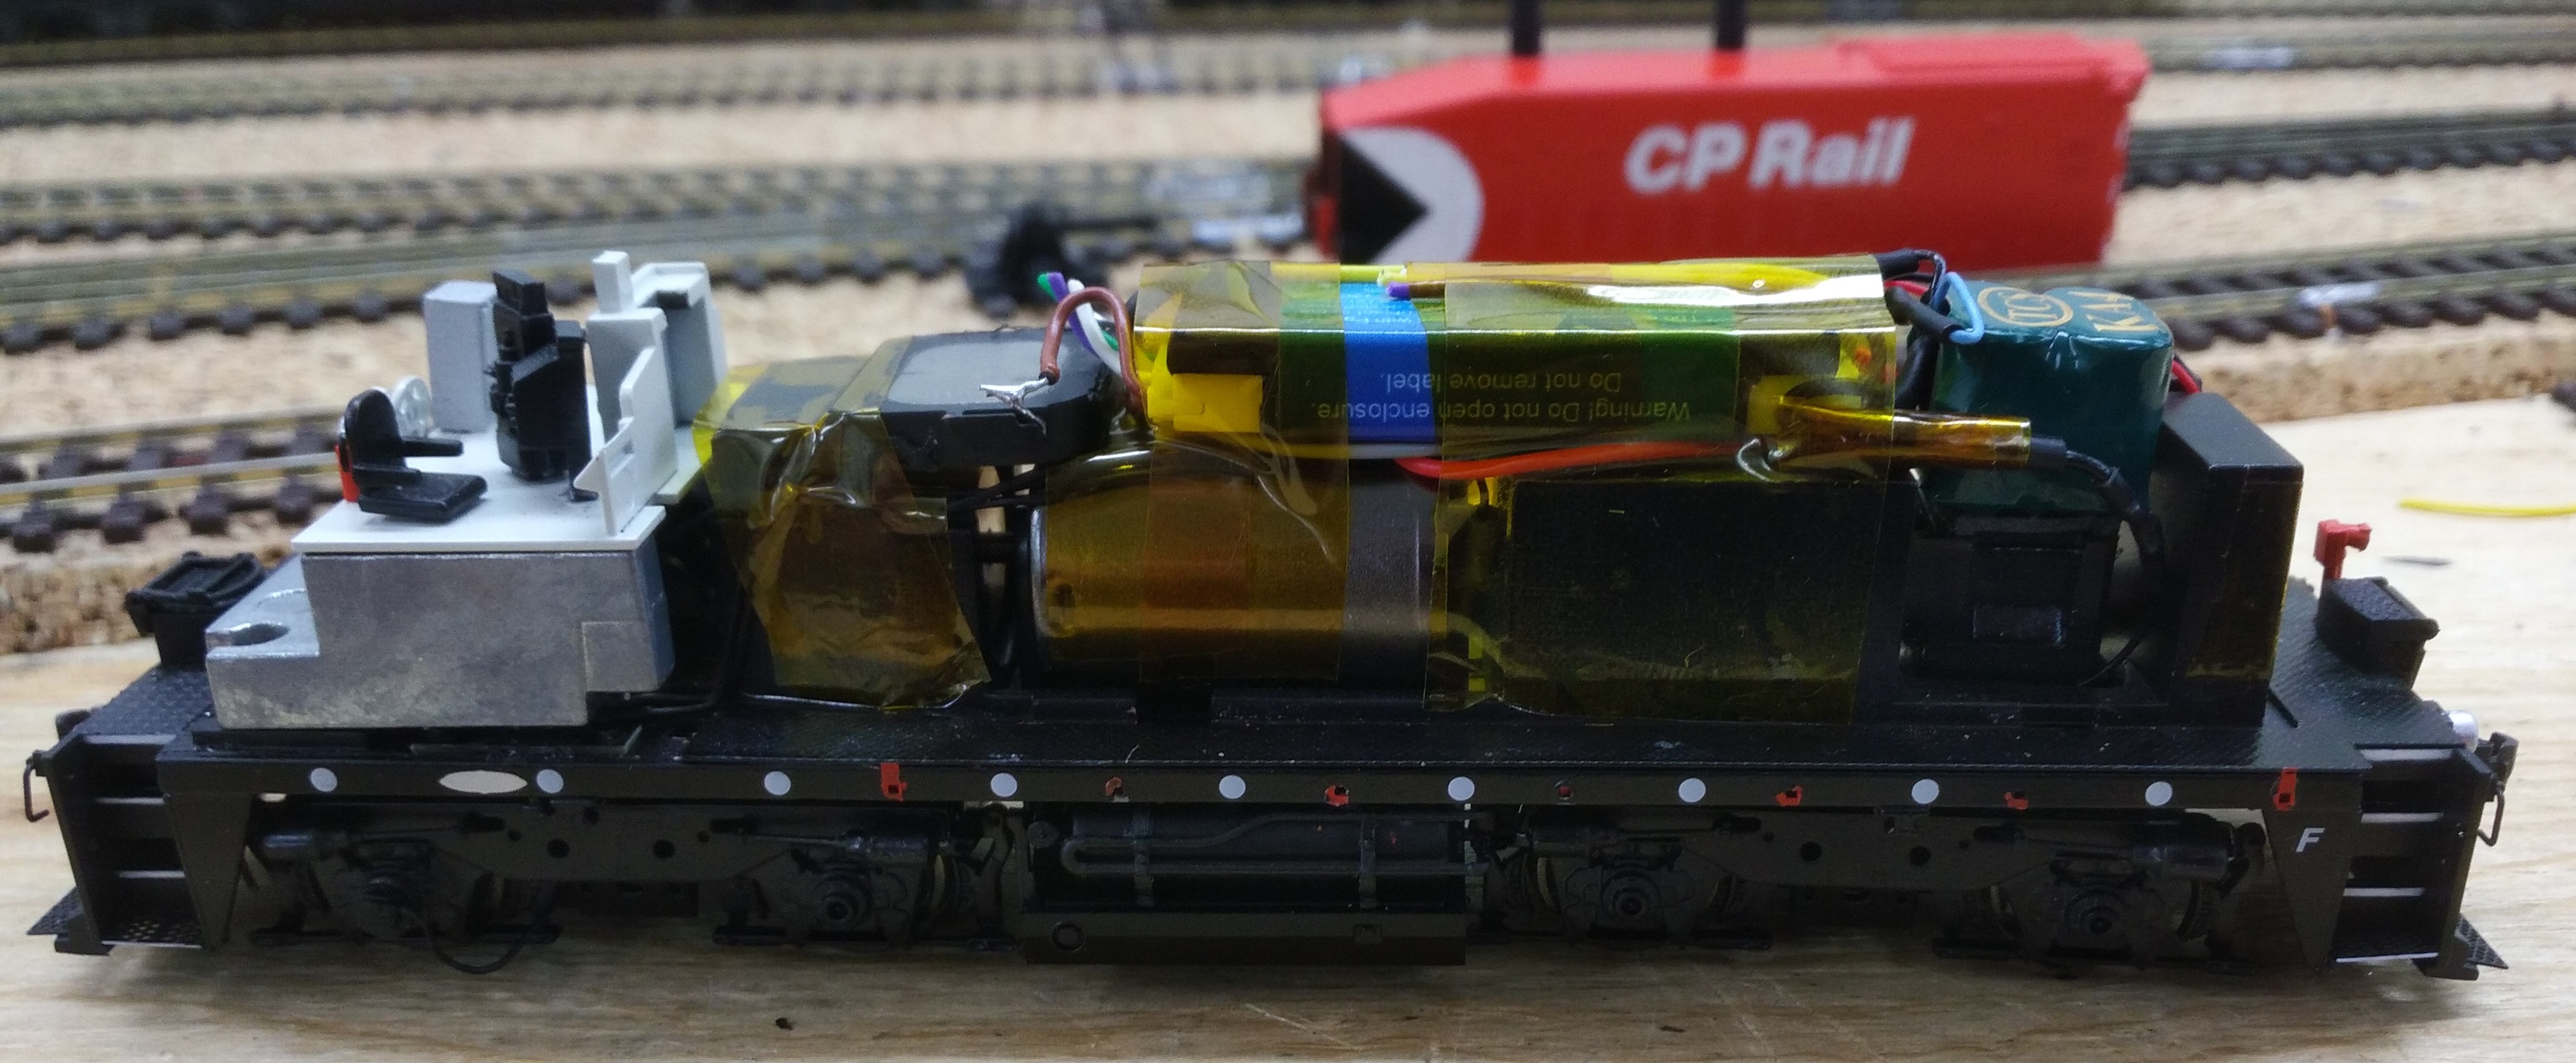
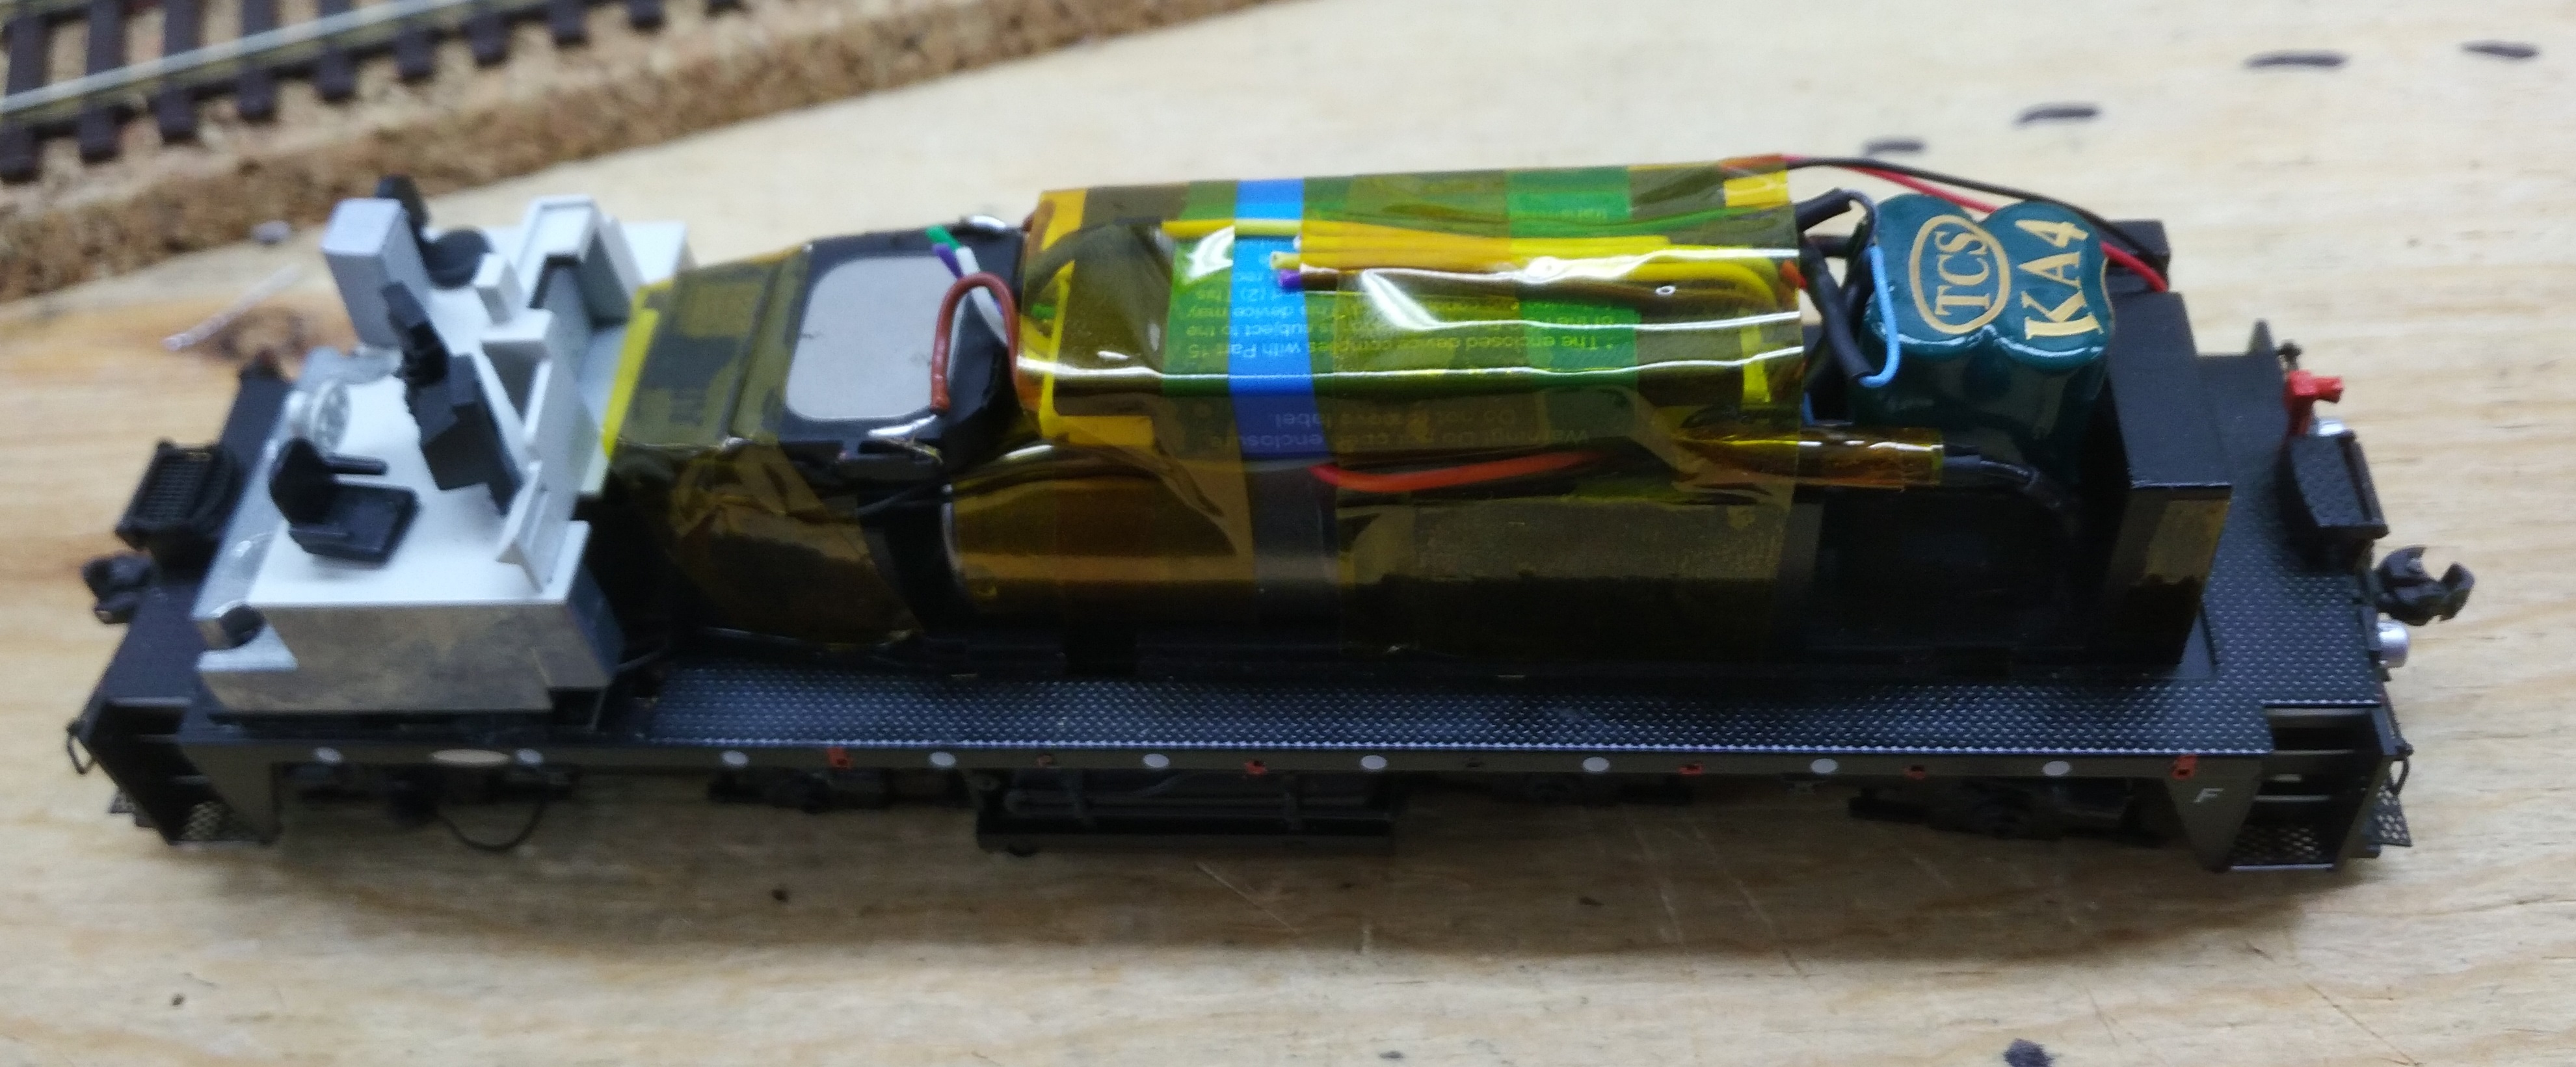
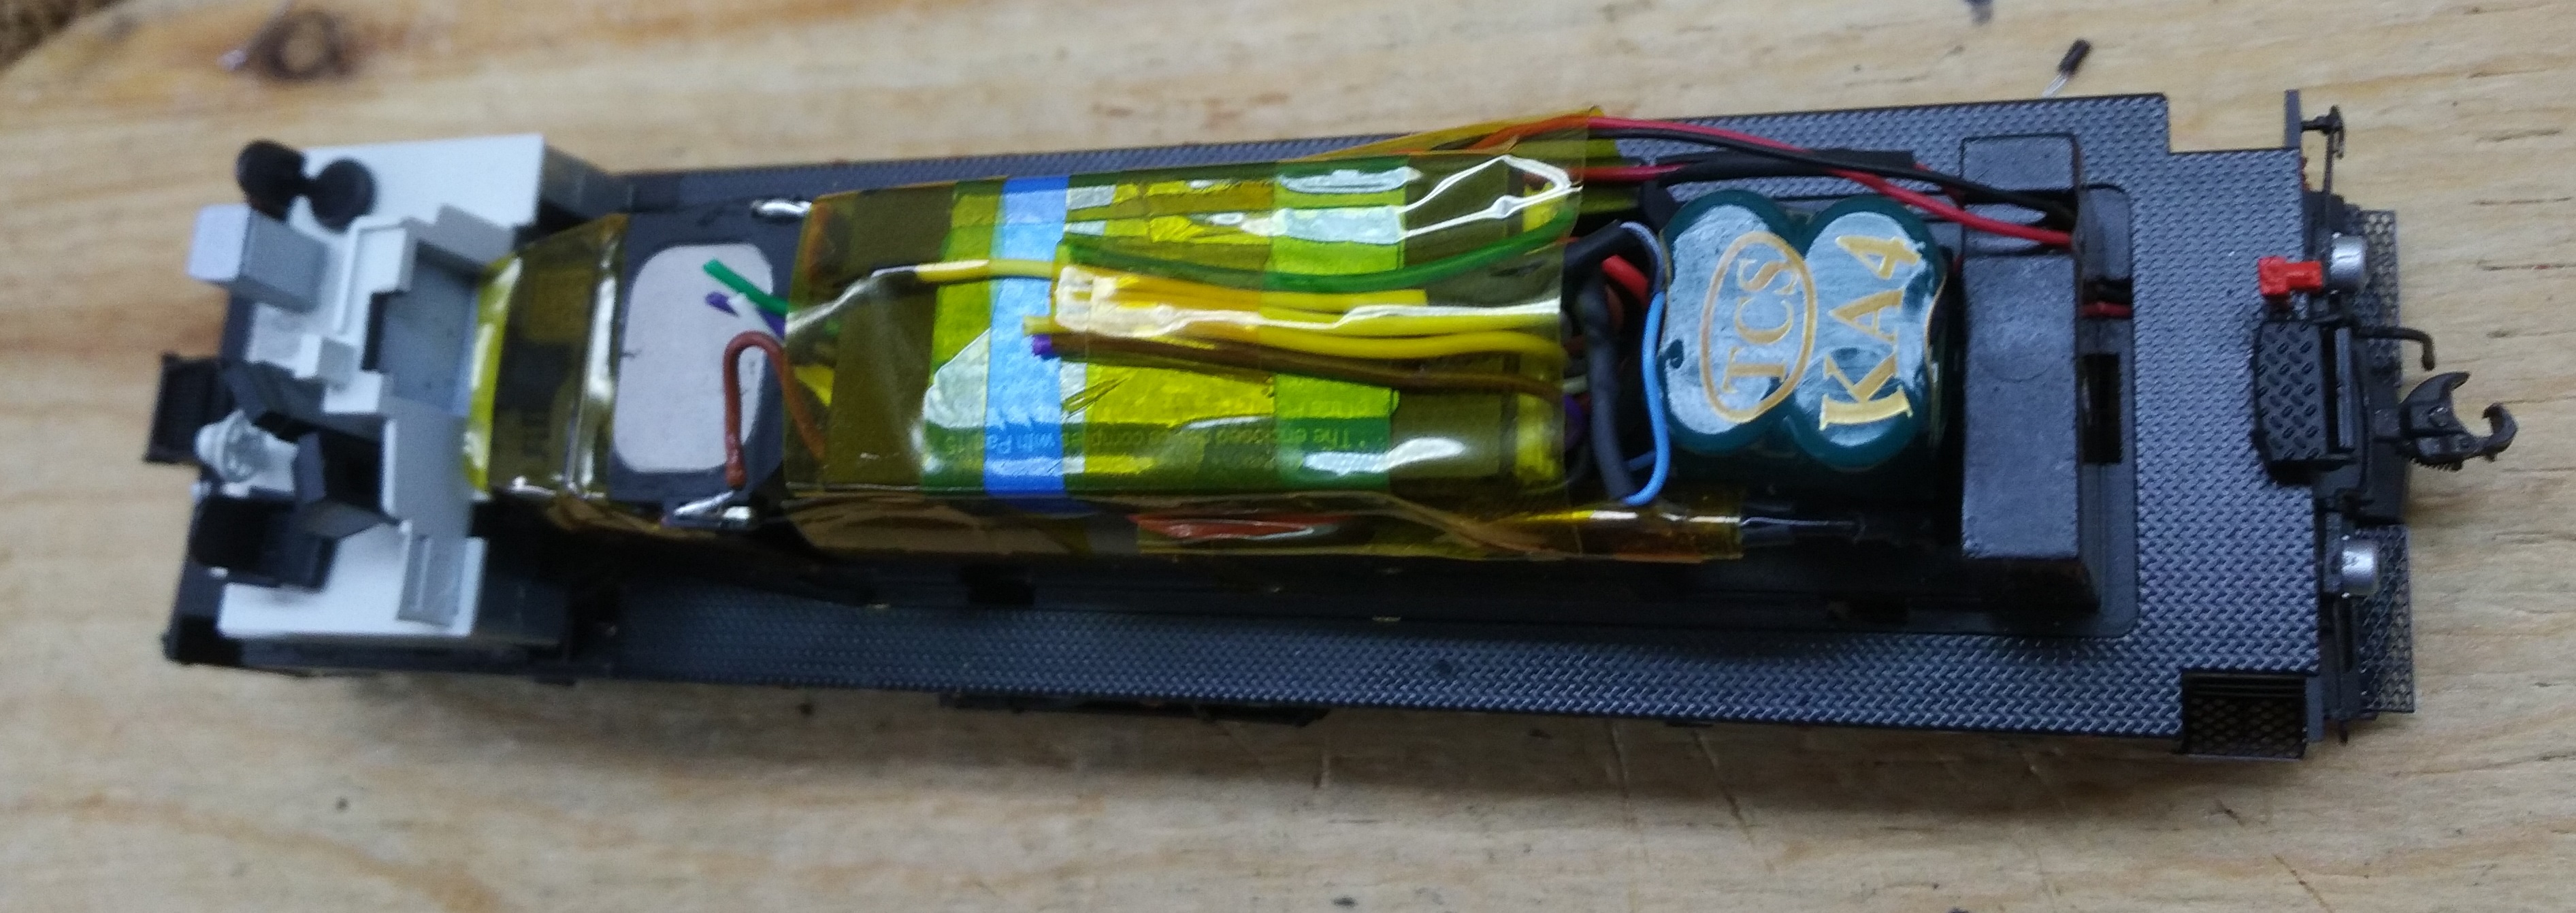
I had to toss a small weight as I mentioned earlier - the speaker goes in that spot, after it was shortened. NOTE: The pictures show the speaker without the final piece of styrene glued on to close up the chamber. The Keep-Alive is double-sided taped to the top of the worm gear lid with extra slack in the wires.

I did not install any lighting. I'm just happy that it's running and sounding good. I did keep the factory boards, so when I'm feeling especially mad, I might try to get them installed. The cab headlights will be the easiest as they are on their own board and just need to play connect-the-wires.

The ULT 567 file sounds pretty good on that speaker. My standard spec is to use Scale Sound Systems speakers, but J.T. is currently in a production hiatus (working on a new driver), and there is just no room in this unit.

Just like my P2K S3, you CAN install Railpro into a SW1200RS. Insanity helps.

Now to do something big, like a SD40-2!!Rapido SW1200 D1.jpgRapido SW1200 D2.jpgRapido SW1200 D3.jpgRapido SW1200 D4.jpg

Ian Lisakowski
Modelling CP Rail & VIA in the early 80's

KPack

  • Conductor
  • ****
  • Posts: 770
Re: Rapido SW1200RS
« Reply #14 on: December 30, 2019, 12:25:33 AM »
Well done Ian.  Nice and clean with everything kept orderly.  Wiring for lights will certainly be a pain though.

Removing factory electronics opens up all kinds of space in a locomotive.  That's why I've done it on nearly all of mine.  I currently have a ScaleTrains Dash 9 that I'm sitting on though because I need to figure out how I'm going to retain the factory step lights while still removing all other electronics.  Lots of wiring to figure out.

-Kevin