Author Topic: Front Range Geep install  (Read 34606 times)

ON28

  • Conductor
  • ****
  • Posts: 262
Front Range Geep install
« on: January 29, 2022, 10:22:54 AM »
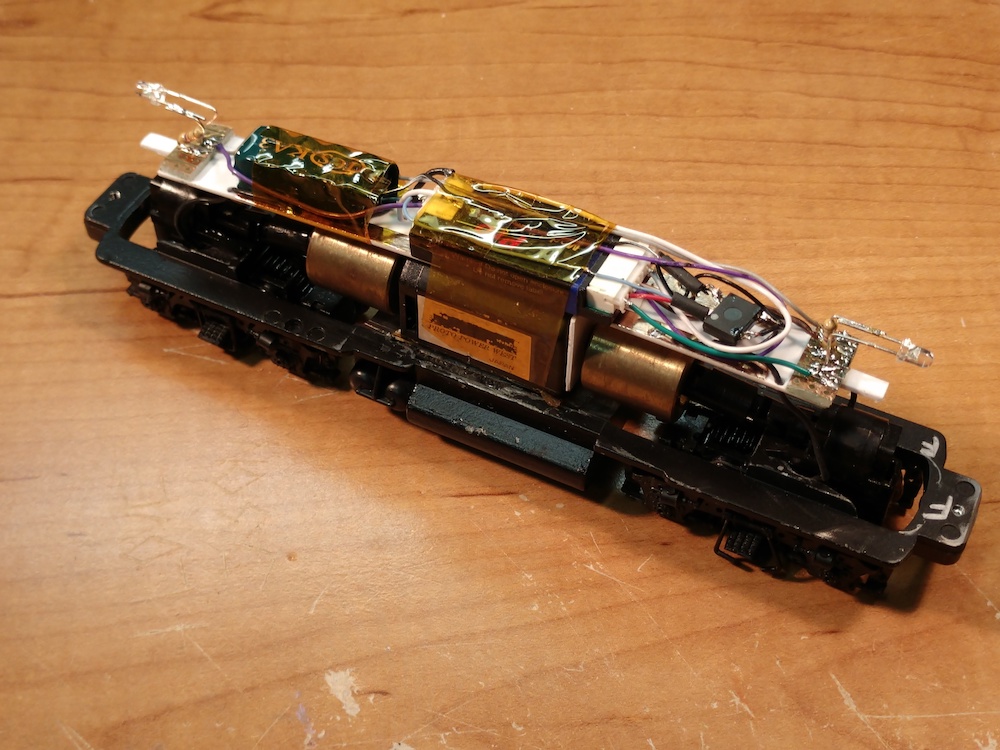
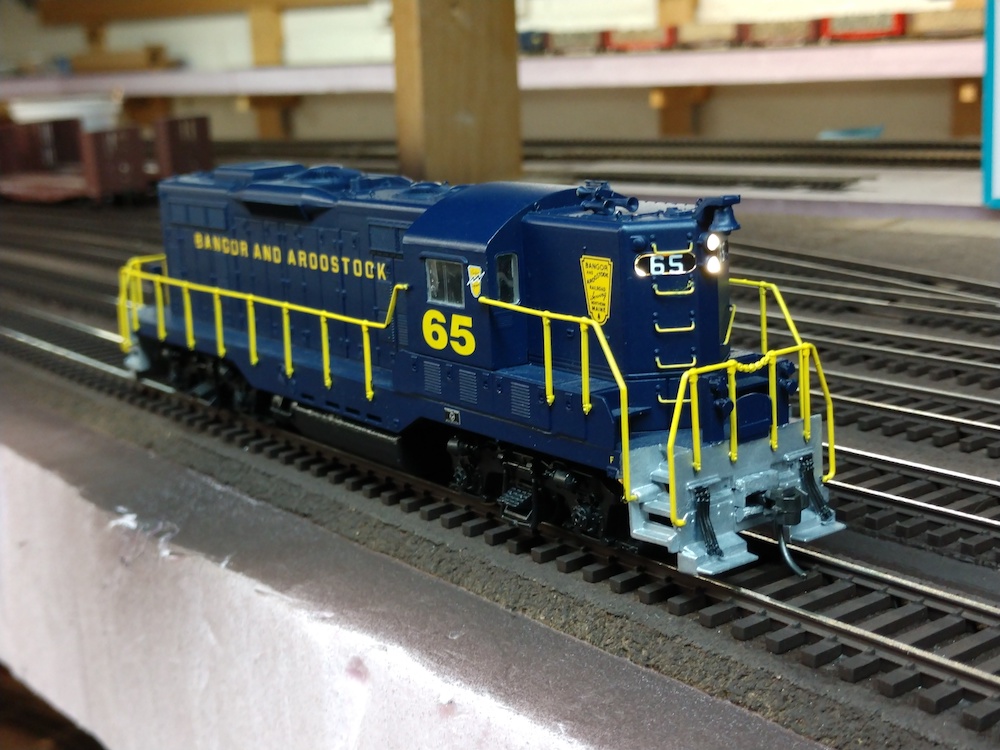
I acquired a rather nice painted and detailed Front Range GP-7 from a friend, who had also repowered for DC with a fine A-Line motor. To start, I isolated the motor with Kapton tape and secured it with double-sided carpet tape. I fashioned a component tray from .040 styrene, supported by more styrene carefully CA'd to the motor, and a narrow 3M foam mounting strip on the motor itself. I wanted to minimize wiring, so I applied strips of copper beaders tape along the sides of the tray, to which I soldered the truck pickup wires run through holes in the tray. The motor wires also run through holes near the center. I CA'd slices of printed circuit board to the ends of the tray, an idea from Lee Nicholas, to mount YeloGlo LED lights. I secured an LM-2 and TCS KA-3 with a bit of double-sided Scotch tape, and the necessary bridge rectifier per Bill Brillinger ahead of the LM, and ran my wires. Some Kapton tape held everything to the tray. The old girl draws 280mAh, testament to A-Line's motor, and is ready to work the mill job to East Millinocket.
IMG_20220128_174956413 copy.jpg

IMG_20220128_183831658 copy.jpg
« Last Edit: January 29, 2022, 10:25:59 AM by ON28 »

Alan

  • Conductor
  • ****
  • Posts: 1073
    • LK&O Railroad
Re: Front Range Geep install
« Reply #1 on: January 29, 2022, 12:37:39 PM »
Clean install. Nice.
Alan

LK&O Railroad website

When I was a kid... no wait, I still do that. HO, 28x32, double deck, 1969, RailPro

KPack

  • Conductor
  • ****
  • Posts: 789
Re: Front Range Geep install
« Reply #2 on: January 29, 2022, 11:25:36 PM »
Love what you did with the styrene, brass, and circuit board.  So clean and easy to do.  I'll have to consider that for my next install.

-Kevin

G8B4Life

  • Signalman (Global Mod)
  • Conductor
  • *****
  • Posts: 1257
  • I'll think of a catchy tag line one day
Re: Front Range Geep install
« Reply #3 on: January 30, 2022, 04:58:12 AM »
Neat install.

When did LM-2's get a blue wrapper? All my LM-2's have a grey wrapper (my LM-3's have a blue wrapper). Just curious as on the surface it looks like an LM-3 from what I have on hand and as we know LM-3's don't need a bridge rectifier and to put the keep alive ahead of the LM.

- Tim

ON28

  • Conductor
  • ****
  • Posts: 262
Re: Front Range Geep install
« Reply #4 on: January 30, 2022, 09:51:51 AM »
Thanks for the kind words, it's the willingness of Kevin, Tim, Alan, Bill and others here to share their expertise that helped me along and makes RailPro such a good system. I'm a novice at electronics and have never installed a DCC decoder, but it's good to learn new things. I have LM3s and 2s, they all have blue labels. As for my installs, I'll point out that all of my locos are older and don't have the space issues of contemporary models. I don't have a milling machine so tend to minimize cutting weights and frames with my Dremel if I don't have to. Lucky for me the BAR ran a lot of F3s and BL2s, so there's more room for components there. I also have never fit components in the roof of a shell. Check my other installs I ave posted here. The copper tape idea I picked up online from someone who used it to run circuits for lights, however, during the time I messed around with battery power I found this EasyWire board from S-Cab, it's double-sided and can be trimmed to fit, though I'm not sure it is still offered. S-Cab does have a similar motherboard but it is $39. Maybe Ring could offer this?

EZWire.jpg


« Last Edit: January 30, 2022, 10:02:32 AM by ON28 »

Josephbw

  • Conductor
  • ****
  • Posts: 251
Re: Front Range Geep install
« Reply #5 on: February 01, 2022, 08:28:46 AM »
Tim, I have a few of the blue wrapped LM-2's. I think they came out right before the LM-3's were introduced. My WAG is that they used up all the grey wrappers.
Joe